При работе в терминале довольно часто приходится копировать файлы. Чаще всего для этого используется команда cp Linux. Она поставляется по умолчанию во всех дистрибутивах и умеет копировать файлы и папки, а также сохранять их атрибуты в файловых системах Linux.
В этой статье мы рассмотрим что представляет из себя эта утилита, её синтаксис, основные опции, а также несколько примеров использования.
Содержание статьи
Синтаксис и опции cp в Linux
Утилита имеет два возможных варианта синтаксиса для копирования файлов: копирование файла в другой файл с указанным именем:
$ cp опции /путь/к/файлу/источнику /путь/к/файлу/назначения
И копирование файла с сохранением его имени в указанную папку:
$ cp опции /путь/к/файлу/источнику /путь/к/директории/назначения
В первом случае, после выполнения команды файл-источник будет полностью перенесен в файл-назначения. Если же в качестве файла назначения выбрана директория, то файл или каталог будет записан в эту директорию с оригинальным именем.
Утилита имеет несколько интересных опций, которые могут сильно помочь при нестандартных задачах копирования, поэтому давайте их рассмотрим:
- --attributes-only - не копировать содержимое файла, а только флаги доступа и владельца;
- -b, --backup - создать резервную копию файла назначения если он существует;
- --copy-contents - копировать содержимое для специальных файлов (сокеты, файлы устройств);
- -f, --force - удалить файл назначения перед попыткой записи в него если он существует;
- -i, --interactive - спрашивать, нужно ли перезаписывать существующие файлы;
- -n, --no-clobber - не перезаписывать существующие файлы;
- -P, --no-dereference - копировать сами символические ссылки, а не то на что они указывают;
- -L, --dereference - копировать не символические ссылки, а то, на что они указывают;
- -l, --link - создавать жесткие ссылки вместо копирования;
- --preserve - переносить указанные атрибуты с файла источника в файл назначения, возможные значения: mode, ownership, time‐stamps, context, links, xattr, all;
- --no-preserve - не переносить указанные атрибуты;
- --parents - сохранять путь, указанный в файле источнике, в папке назначения;
- -r, --recursive - копировать папку Linux рекурсивно;
- --reflink - использовать Copy on Write если это поддерживается файловой системой;
- -s, --symbolic-link - не выполнять копирование файлов в Linux, а создавать символические ссылки;
- -S, --suffix - указать суффикс для резервных копий файлов;
- --sparse - настройка работы с разреженными файлами;
- -t, --target-directory - считать файл-назначения директорией и копировать файл-источник или директорию-источник в эту директорию с оригинальным именем;
- -T, --no-target-directory - считать директорию назначения файлом или директорией для записи данных. Если в качестве источника выбран файл, то он будет скопирован с новым именем. Если директория, то её содержимое будет скопировано в директорию назначения;
- -u, --upgrade - скопировать файл, только если он был изменён;
- -x, --one-file-system - рекурсивное копирование не должно выходить за пределы этой файловой системы;
- -v, --verbose - максимально подробный вывод.
Кроме перечисленных выше опций, существуют опции, которые объединяют в себе несколько других с определёнными значениями. Во основные из них:
- -p - сохранять владельца, временные метки и флаги доступа при копировании, аналогично --preserve=mode,ownership,timestamps;
- -d - копировать символические и жесткие ссылки именно как ссылки, аналогично --no-dereference --preserve=links;
- -a - режим резервного копирования, при котором сохраняются все атрибуты, ссылки, а также выполняется резервное копирование папок, аналогично --recursive --preserve=all, --no-dereference;
Теперь, когда вы знаете основные опции, можно перейти к практике. Давайте рассмотрим основные примеры использования утилиты cp.
Примеры использования cp
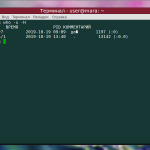
Для примеров из этой статьи я создам несколько файлов file1, file2, file3, одну символическую ссылку link1 на файл file1 и жесткую ссылку на файл file3. Затем папку source и в ней file4, file5, file6 и папку destination. Вот так можно создать ссылки:
ln -s $(realpath file1) link1
ln file3 hlink1
В результате получится такая структура:

1. Копирование файла в файл
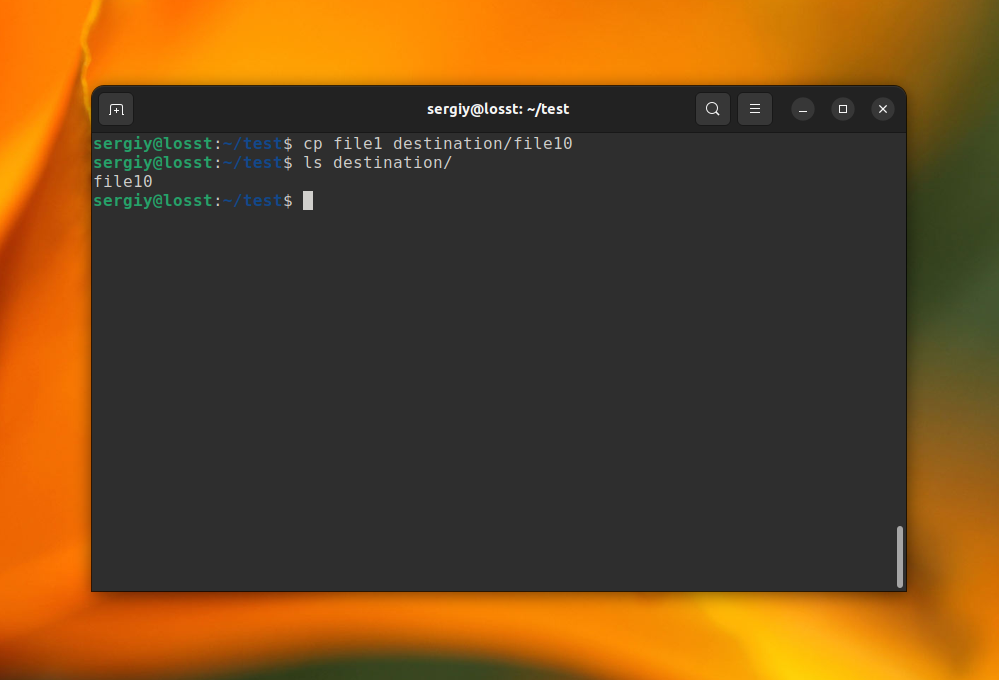
Самый простой пример копирования файлов когда один файл копируется в другое место с заданным именем. Для этого надо указать имя файла в папке назначения. Например, для того чтобы скопировать файл file1 в папку destination с именем file10 нужно выполнить такую команду:
cp file1 destination/file10
Таким же способом можно создать копию файла в той же папке.
2. Копирования файла в папку
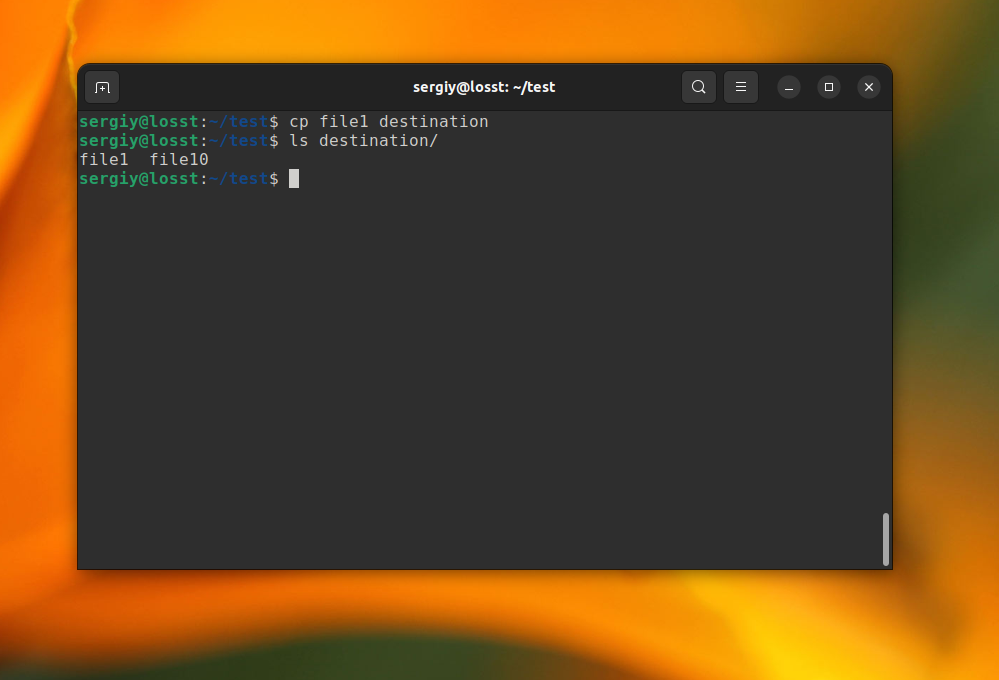
Если вам не нужно менять имя файла или надо скопировать несколько файлов, то можно просто указать папку, куда их копировать не указывая имя файла. Например, для того чтобы скопировать файл file1 в папку destination с тем же именем выполните:
cp file1 destination/
Причём в конце команды слеш ставить не обязательно. Утилита и так поймет что это папка.
3. Копирование папки в папку
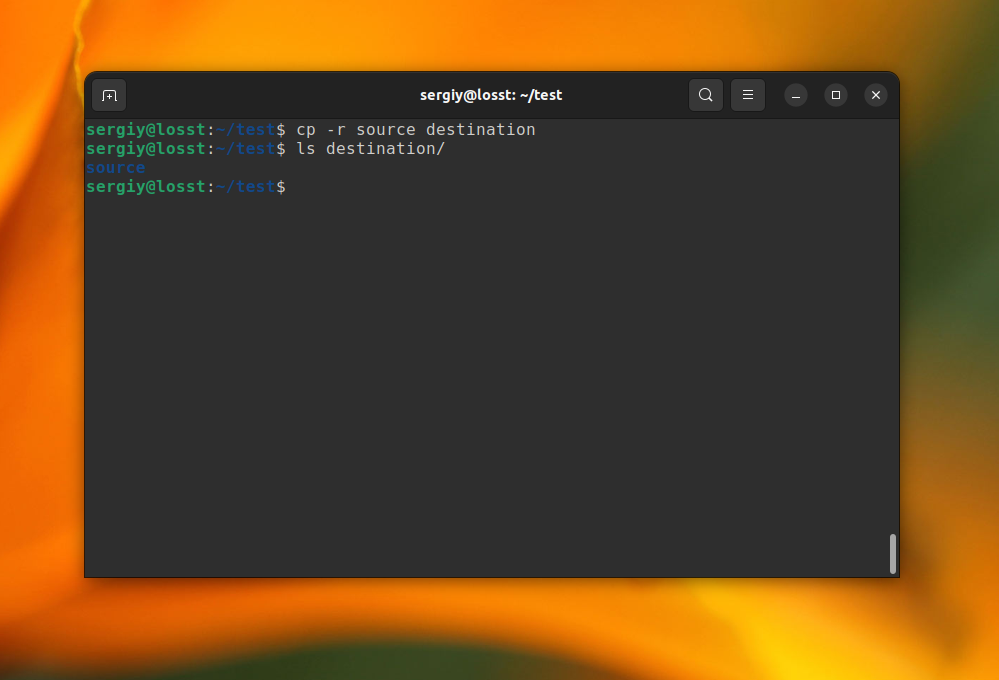
Для копирования папок нужно использовать опцию -r (--recursive). Скопировать одну папку в другую довольно просто, если папка назначения существует. Для того чтобы скопировать папку source в папку destination выполните команду:
cp -r source destination
Или можно явно указать, что нужно именно скопировать source в destination с помощью опции -t:
cp -t file1 destination
Тогда, если папка destination не существует вы получите ошибку, вместо не очевидного поведения.
4. Копирование содержимого папки в папку
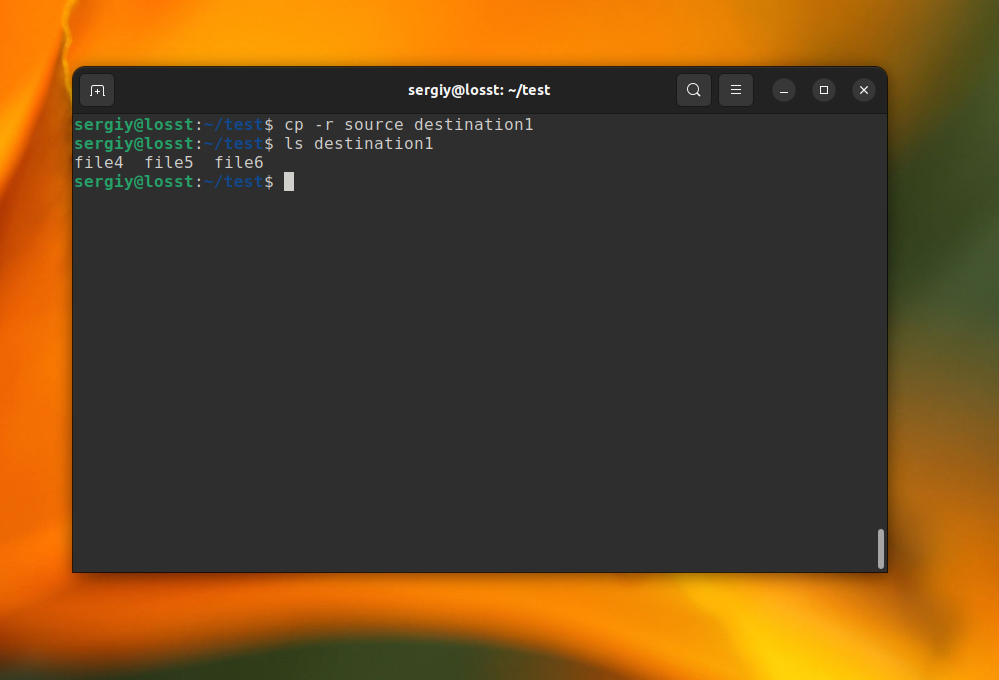
Для копирования содержимого одной директории в другую можно воспользоваться первым вариантом синтаксиса. Команда выглядит аналогичной предыдущему примеру, но она будет работать только если папки назначения не существует. Например, для того чтобы скопировать содержимое папки source в папку destination1 нужно использовать такую команду:
cp -r source destination1/
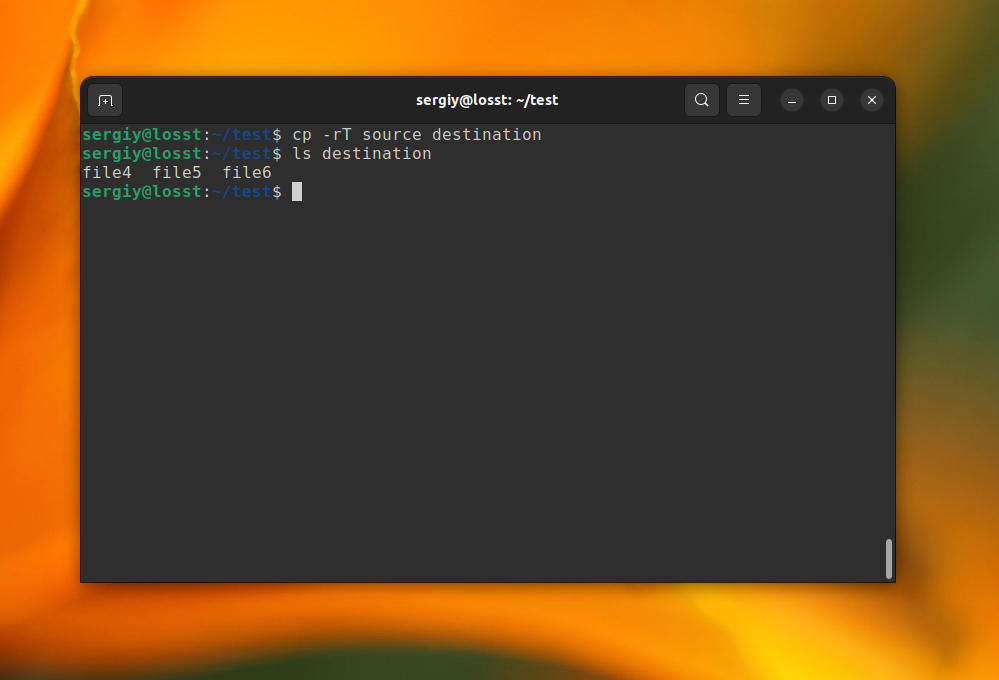
Если папка назначения существует, то в ней будет создана папка source. Для того чтобы избежать такого поведения можно использовать опцию -T:
cp -rT source destination/
Или же можно явно указать, что вас интересует именно копирование содержимого папки с помощью символа *. Например:
cp source/* destination
Однако в этом случае скрытые файлы, которые находятся в этой папке скопированы не будут. Копирование вложенных файлов и папок работает аналогичным образом.
5. Обработка существующих файлов
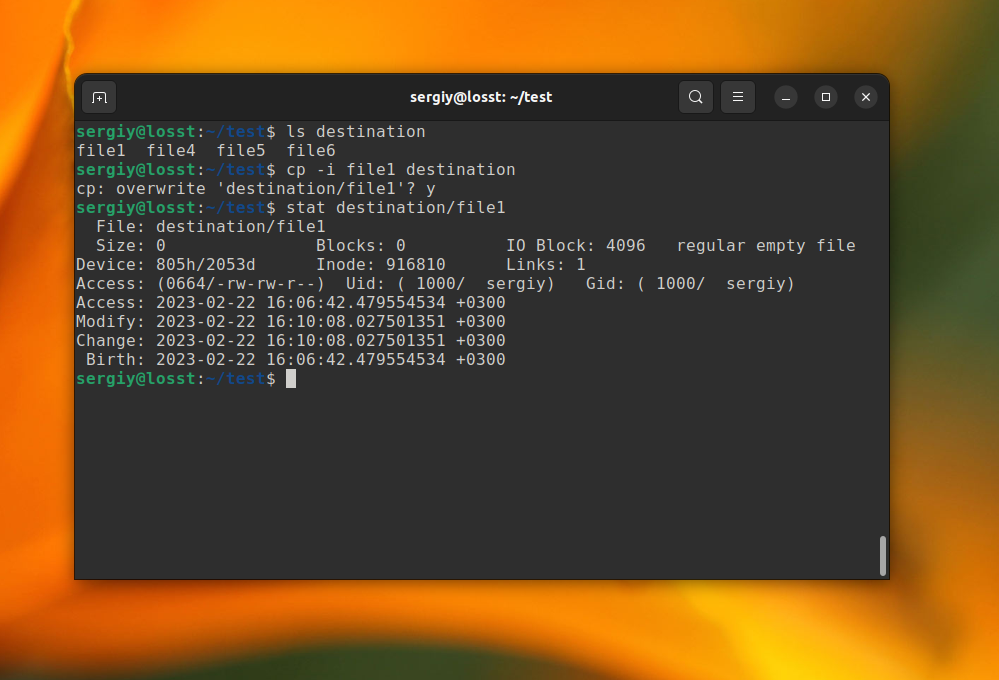
По умолчанию, если файл в папке назначения уже существует то он будет перезаписан. Если вы хотите чтобы утилита спросила вас стоит ли перезаписывать каждый существующий файл используйте опцию -i. Например:
cp -i file1 destination
С помощью опции -n можно никогда не перезаписывать существующие файлы:
cp -n file1 destination
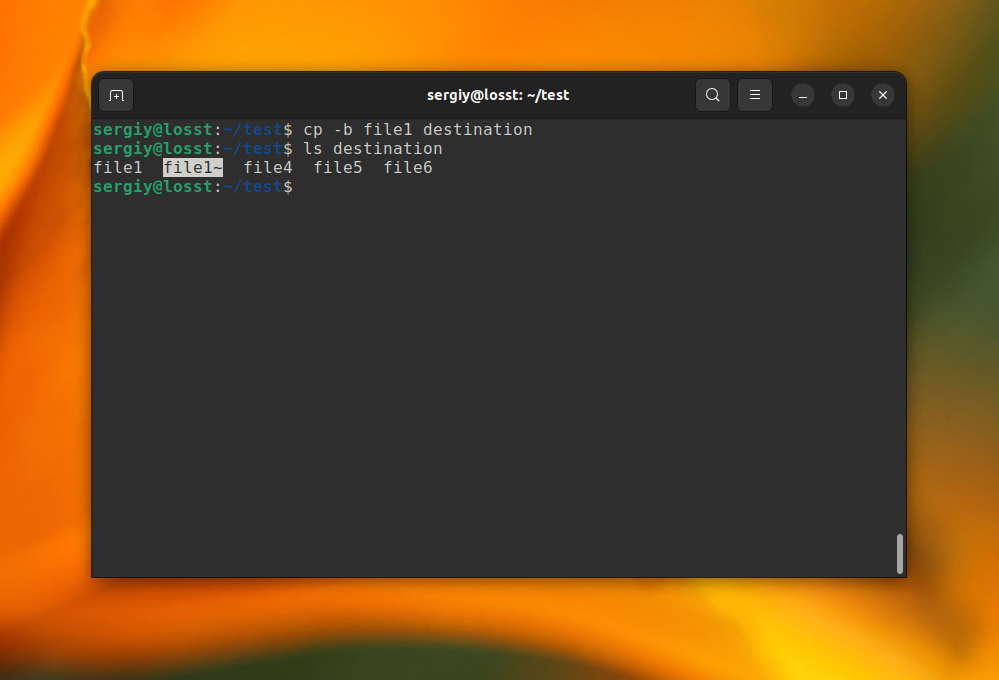
Кроме того, для существующих файлов можно делать резервную копию с помощью опции -b или --backup. Например, если использовать опцию -b, то в конце названия файла резервной копии будет добавлен символ тильды ~:
cp -b file1 destination
При использовании опции --backup можно настроить имя резервной копии, Вот доступные варианты:
- none - резервная копия не делается;
- numbered - к имени файла будет добавляться номер;
- simple - в конец файла будет добавлен знак ~;
- existing - если в директории назначения уже есть резервные копии, то будет использоваться такой же тип именования как и у них.
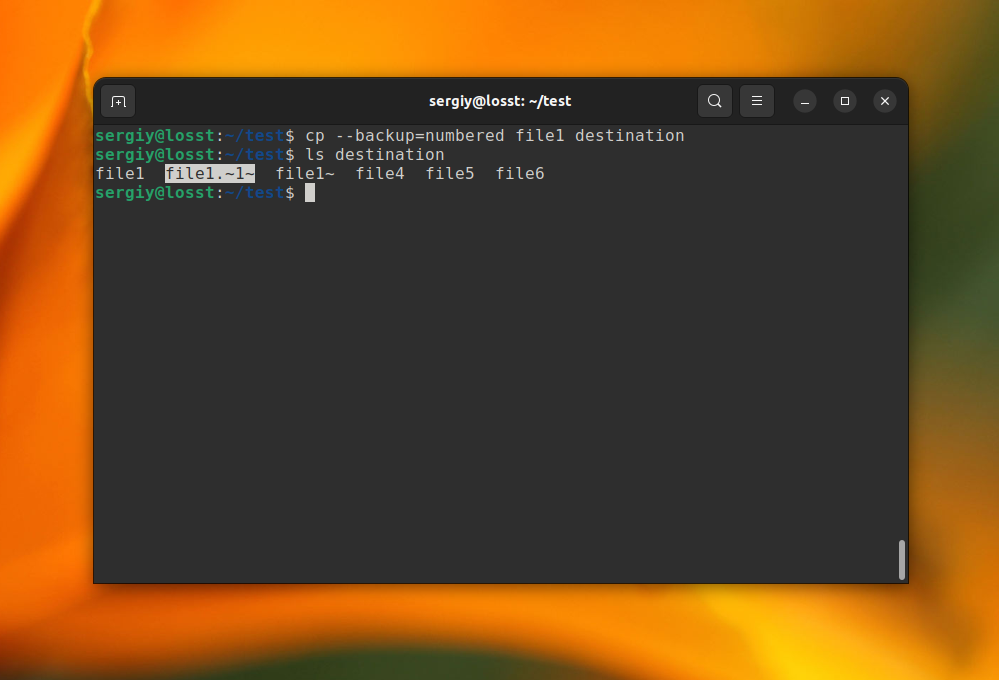
Например, для того чтобы использовать номер в имени резервной копии используйте такую команду:
cp --backup=numbered file1 destination
Ещё один вариант обработки существующих файлов, который может быть полезен для больших файлов - заменять только если файл источник новее или файл в папке назначения не существует. Для этого нужно использовать опцию -u или --upgrade:
cp -u source/* destination
6. Копирование ссылок
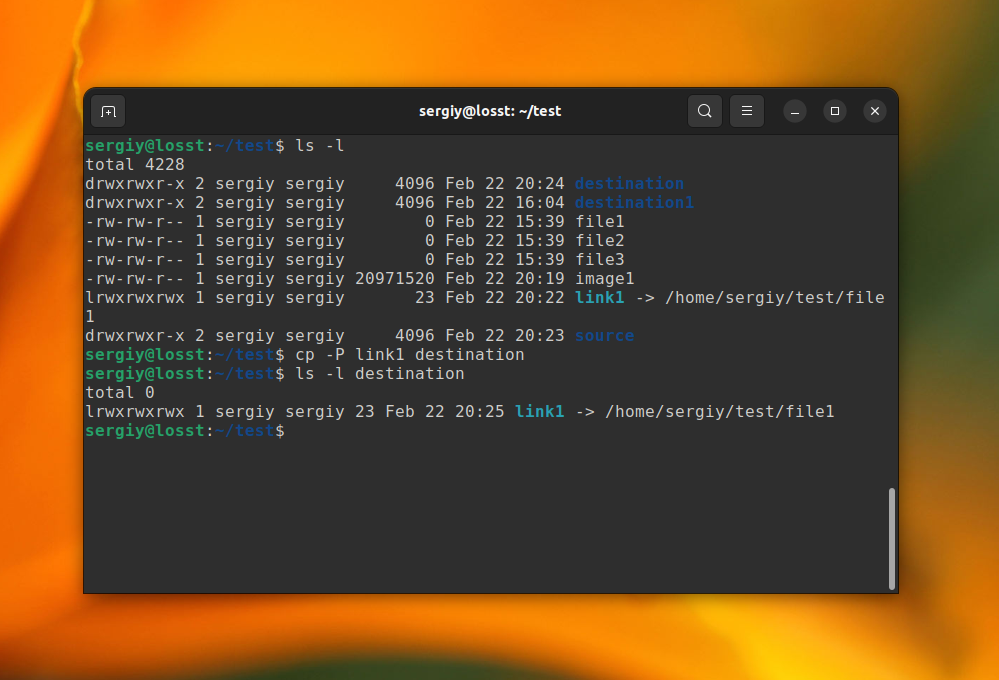
В файловых системах Linux существует такое понятие как символические и жесткие ссылки. Команда cp может копировать их по разному. По умолчанию, как для жестких так и для символических ссылок создается копия файла, уже не связанная с оригиналом. Если вы хотите чтобы символические ссылки копировались именно как ссылки, то нужно использовать опцию -P:
cp -P link1 destination
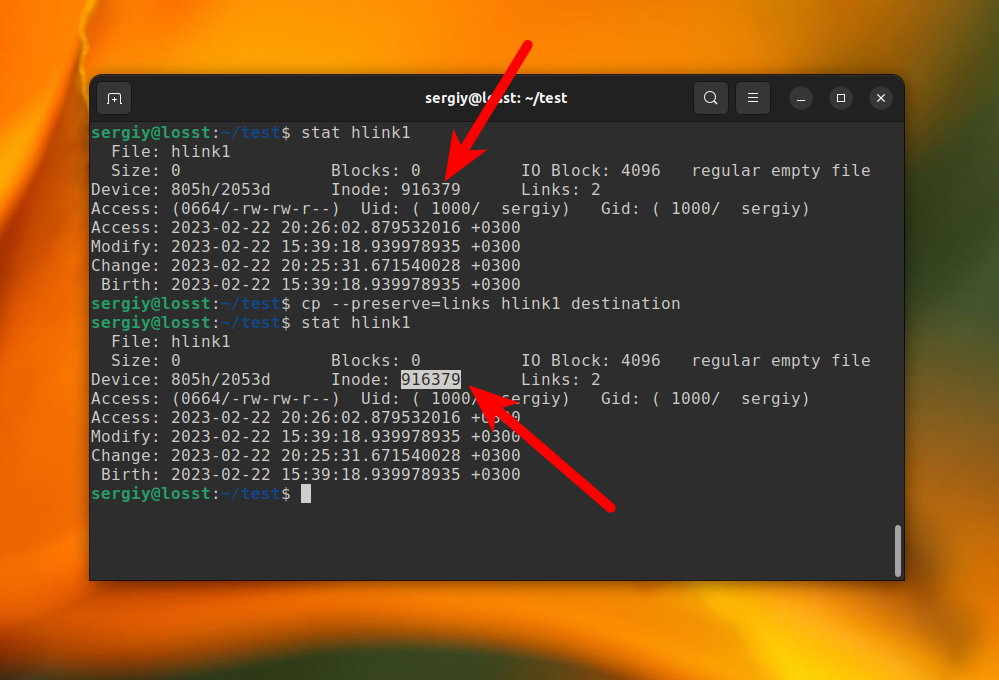
Для жестких ссылок существует другой подход. Если вы хотите чтобы жесткая ссылка осталась ссылкой после копирования, нужно использовать опцию --preserve со значением links:
cp --preserve=links hlink1 destination
7. Сохранение атрибутов при копировании
По умолчанию cp обновляет временные метки и атрибуты прав доступа файлов при копировании. Но иногда может возникнуть необходимость сохранить оригинальные значения атрибутов. Для этого можно использовать опцию --preserve. Вот её возможные параметры:
- mode - права доступа, сюда входит чтение, запись, выполнение и дополнительные флаги;
- ownership - владелец и группа;
- time‐stamps - временные метки, такие как дата обновления, дата создания и дата последнего доcтупа;
- context - контекст SELinux;
- links - сохранение жестких ссылок;
- xattr - дополнительные атрибуты, которые настраиваются с помощью команды chattr;
- all - всё выше перечисленное.
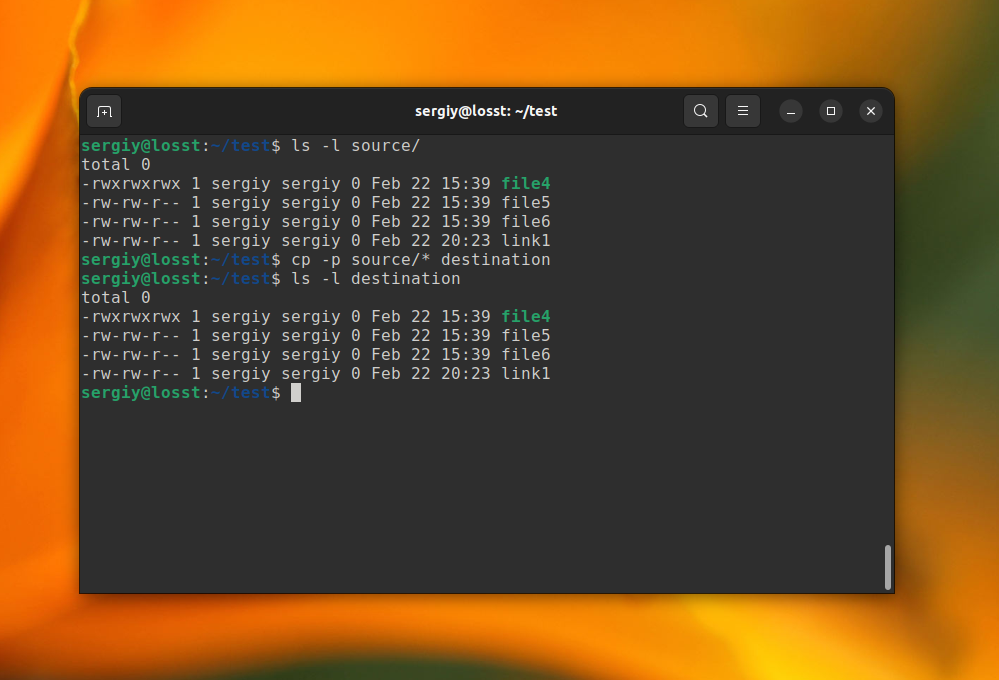
Если вы хотите оставить оригинального владельца и права доступа используйте опцию --preserve со значением mode,ownership или же опцию -p:
cp -p source/* destination
Если надо сохранить всю структуру файловой системы, в том числе символические и жесткие ссылки и временные метки, то можно использовать опцию -a:
cp -a source/* destination
8. Копирование и Copy-on-Write
Некоторые новые файловые системы, такие как Btrfs и ZFS поддерживают технологию Copy-on-Write. При её использовании, фактическое копирование данных из файла будет происходить только при его изменении. Эта функция работает в рамках одной файловой системы и сильно ускоряет копирование файлов. Но зато, их изменение может быть немного замедлено. По умолчанию cp использует Copy-on-Write только начиная с версии CoreUtils 9.0. но вы можете включить или отключить её вручную с помощью опции --reflink. Вот доступные значения:
- always - всегда использовать, если не поддерживается будет выведена ошибка;
- auto - использовать только если поддерживается;
- never - никогда не использовать.
Например, для того чтобы включить обязательное использование CoW добавьте --reflink=always в команду копирования:
cp -reflink=always file3 destination
9. Обработка разреженных файлов
Разреженные файлы, это файлы которые содержат последовательности нулевых байт и в них эти последовательности заменены на их описание. Это актуально для образов дисков Qemu или VirtualBox, которые могут содержать много пустого места, которое не обязательно записывать на диск. По умолчанию, cp создает разреженные файлы только если файл источник разрежен. Однако можно настроить его таким образом, чтобы все файлы содержащие последовательности нулей делались разреженными. Настроить это поведение можно с помощью опции --sparse. Вот возможные значения:
- auto - используется по умолчанию;
- never - делать разреженные файлы не разрежеными;
- always - делать файлы разреженными если они содержат достаточное количество нулевых байт.
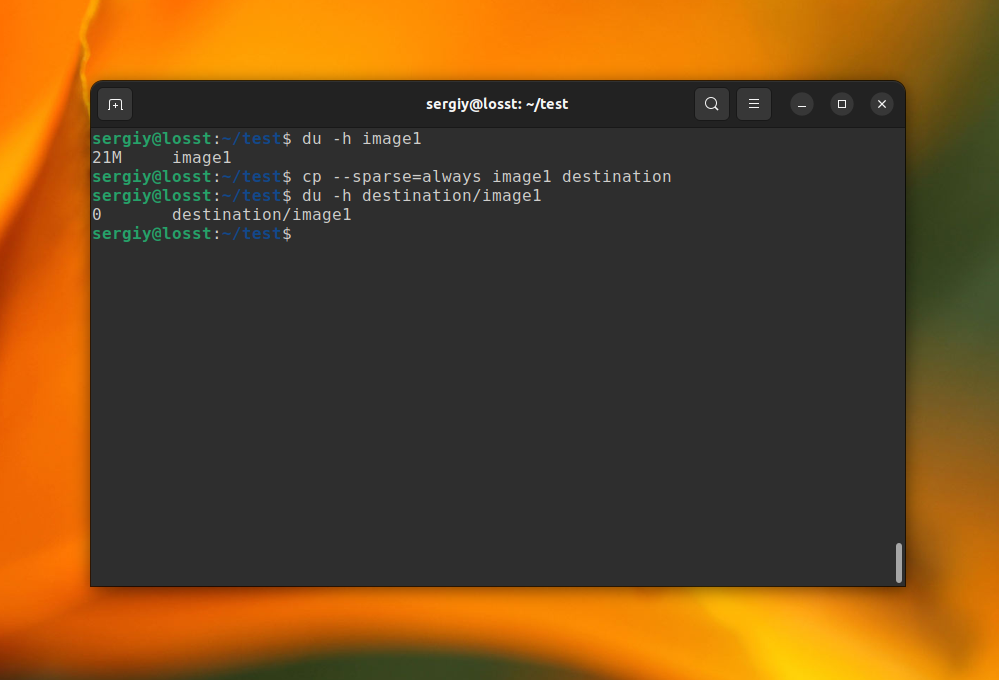
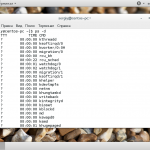
В качестве примера можно создать образ на основе /dev/zero размером 20 мегабайт:
dd if=/dev/zero of=image1 count=20 bs=1M
Если скопировать этот файл с опцией --sparse=always, то он станет разреженным и будет занимать значительно меньше места на диске:
cp --sparse=always ./image1 /destination
Выводы
В этой статье была рассмотрена команда cp Linux. Эта команда существует довольно давно и не очень удобна для копирования больших файлов, поскольку тут нет вывода прогресса копирования. Но зато она поддерживает много других полезных функций. Практически все задачи, по копированию файлов в Linux могут быть выполнены с помощью этой утилиты.
Благодарю за работу. Полезная и нужная статья.
Здравствуйте, большое спасибо за сайте, давно вас читаю.
можете ли вы подкинуть какие то идеи насчет следующей задачи: необходимо без системы драг-н-дроп скопировать файл и передать его в телеграм, то есть пользуясь только консолью, даже без мыши.
Я пробовал использовать xclip что бы скопировать файл,однако он копирует в буфер clipboard содержимое файла.Если же скопировать из меню ЛКМ, то в буфере( если смотреть через виджет в панели статуса) показан сам файл, то есть название.Если не сложно, подкиньте идеи, заранее спасибо
Здравствуйте.
В Вашем случае, подозреваю, необходимо работать с "телеграмским" клиентом напрямую, без буфера обмена. Т.е. сначала внимательно изучить ключи командной строки клиента на предмет операций с файлами. Вполне вероятно, что есть функция передачи файла определенному абоненту, что-нибудь типа "telegram --sendfile ". Я бы начал с этого (сам телегой не пользуюсь, поэтому точно сказать затрудняюсь).
Если же ничего такого нет, то или искать сторонний софт, или ковырять протокол и кодить файлопосылатель самому. Но осторожней, это путь истинного джедая (в смысле - тот еще геморрой), в итоге он может привести Вас на темную сторону силы! К красноглазию...
Мне кажется, что фразу "В первом случае, после выполнения команды файл-источник будет полностью перенесен в файл-назначения" (в самом начале, пункт "синтаксис и опции") лучше заменить чем-нибудь вроде "файл-источник ЗАМЕНИТ файл-назначения, если такой существует." Просто утилита cp не переносит файлы, это прерогатива mv. Как-то это предложение глаз царапает, уж извините. Я аж чуть не поседел и срочно проверять кинулся. Файл не перенесло, выдохнул с облегчением 🙂
Во втором случае тоже, кстати, заменит, если файл с таким именем уже будет в каталоге назначения.
Или, может, абзац "В первом случае, после выполнения команды файл-источник будет полностью перенесен в файл-назначения. Если же в качестве файла назначения выбрана директория, то файл или каталог будет записан в эту директорию с оригинальным именем." заменить целиком? Думаю, тут хватило бы такого: "Если в каталоге назначения уже существует файл с таким именем, он будет заменен файлом-источником", или что-нибудь наподобие.
А у меня вот такая проблема возникла после обновления в сети.
Есть два хоста:
Windows server 2012 r2 x64 сетевая карта tp-link tx201 - 2,5гбит/с (с сетевой папкой)
и Windows 10 x64 сетевая карта tp-link tx201 - 2,5гбит/с - забирающая сторона
Прямое соединение компов кабелем кат8.
У каждого компа есть встроенные сетевые карты гигабитные к ним подключается кабель от роутера но работают в режиме 100мбит/с - для интернета.
Суть вопроса: При копировании в оконном режиме скорость 60-120мбайт/с
При копировании в консольном режиме (cmd) скорость 8-12мбайт/с - как увеличить скорость?(соответствует скорости 100мбит/с.)
Трафик при копировании идет через скоростные карты ( tp-link tx201 - 2,5гбит/с) с обоих сторон при каждой попытке копирования.
Пробовал выставлять метрики в ручную, задавать скорость и дуплекс в ручную - не помогло увеличить скорость копирования в консоли.
Замерял скорость утилитой iperf3.1.1_64 скорость в районе ~2гбит/с
В чем может быть затык такой низкой скорости в консоли?
Интересует именно скорость в командной строке, так как все автоматизировано руками bat файлами - в "планировщике задач"
(Использовал команды xcopy и robocopy с разными ключами).
Всё это предстаит сделать и в сетях linux. Возникает второй вопрос - не возникнет ли такая же проблема ?
Может кто то затестить скорость копирования в консоли bash выдает ли сетевая карта ту скорость которая заявлена ?