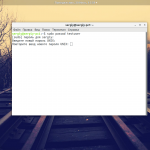
При подключении к серверу по SSH вы можете получить ошибку "Received disconnect from x.x.x.x port 22:2: too many authentication failures" или "ssh permission denied (publickey)". Если кратко, это означает, что ваш SSH клиент не смог авторизоваться на удаленном сервере из-за исчерпания лимита попыток авторизации.
В этой статье мы рассмотрим почему могла возникнуть такая проблема, как это всё работает, а также как её исправить и настроить систему, чтобы такого не случалось в будущем для этого SSH-соединения. При написании статьи использовалась Ubuntu 24.04, но информация должна быть актуальной и для других дистрибутивов.
Содержание статьи
Почему возникает ошибка?
SSH поддерживает несколько способов авторизации, основные из них - авторизация без пароля с помощью пары открытого и закрытого ключей и обычная авторизация с помощью пароля. Разумеется, первый вариант более надежный, удобный и безопасный, поскольку вам не нужно помнить пароль, а злоумышленники, которые захотят проникнуть на ваш сервер, не смогут даже попытаться его подобрать.
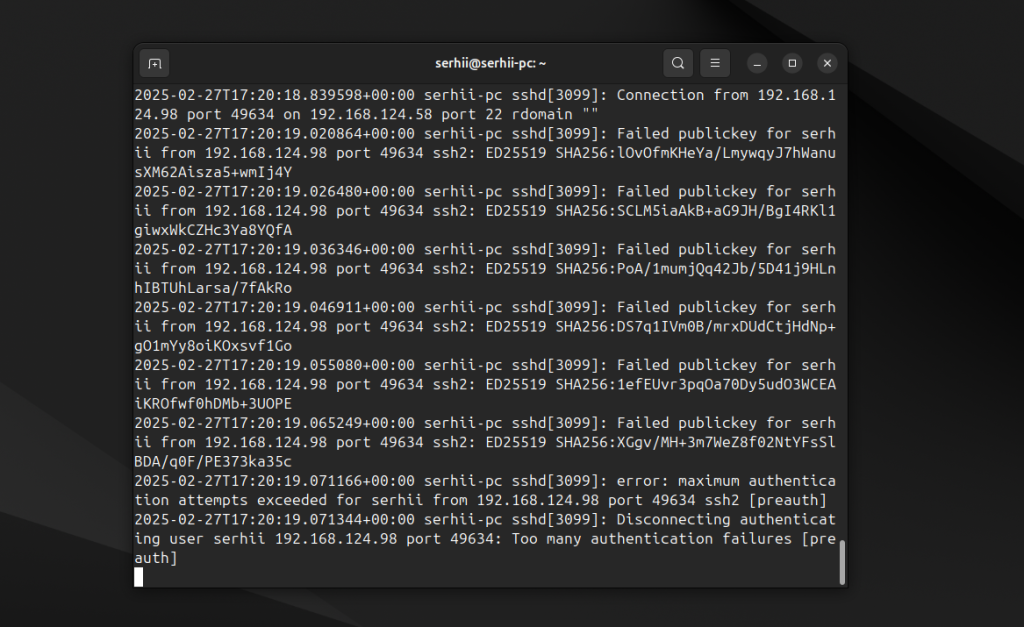
Поэтому авторизация по ключу используется по умолчанию. В большинстве случаев это не является проблемой, так как сервер сообщает клиенту какие методы авторизации можно использовать, а клиент выбирает порядок, в котором он будет их перебирать. Но общее количество попыток авторизации ограничено. И если что-то не совпадает, и клиент не успевает авторизоваться, тогда возникает такая ошибка.
Если вы так и хотели авторизоваться по ключу, то здесь есть три возможные причины проблемы:
- Ваш ключ не добавлен на сервер. Для того чтобы это работало, на вашем компьютере должен быть приватный ключ, а на удаленном соответствующий публичный ключ должен быть добавлен в файл ~/.ssh/authorized_keys.
- Ваш ключ не добавлен в агент ssh. Если вы переносили ключи с другого компьютера, то недостаточно просто положить их в каталог ~/.ssh. Их также нужно добавить с помощью команды ssh-add.
- В вашей системе много ключей. Если даже ключ добавлен, но у вас их много, то SSH клиент пробует первые несколько, и если они не подходят, поскольку на количество авторизаций есть ограничение, вы получаете ошибку.
Если же вы хотите авторизоваться по паролю, то всё немного иначе:
- Сервер поддерживает авторизацию по ключу. Если SSH сервер сообщит, что он поддерживает авторизацию по ключу, и у вас много ключей в системе, то SSH вам даже не предложит ввести пароль, и вы столкнетесь с теми же проблемами, что и выше. Чтобы это исправить, можно указать порядок способов авторизации с помощью опций команды ssh.
- Вы используете не тот механизм авторизации. Существует несколько механизмов авторизации SSH, которые предусматривают ввод пароля, как минимум это password и keyboard-interactive. Если вы настроили использование password перед publickey, а сервер хочет keyboard-interactive, будет та же ошибка.
В любом случае нет смысла пытаться угадать в чем там проблема. Нужно посмотреть логи. Для этого добавьте к вашей команде подключения к серверу по SSH опцию -vvv. Например:
ssh -vvv serhii@192.168.56.124
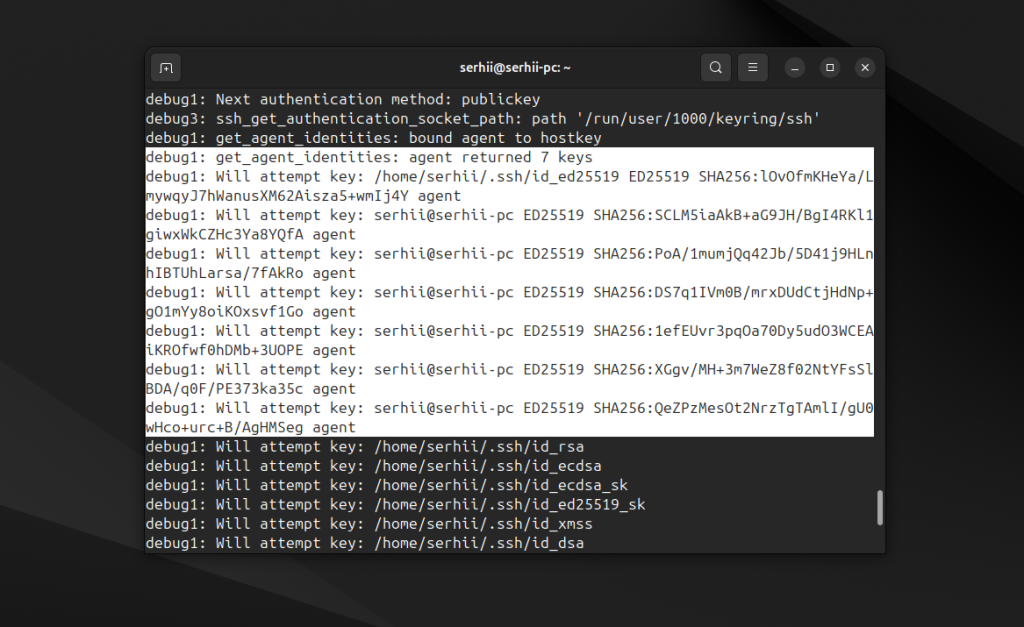
Такая команда покажет не только саму ошибку, но и процесс подключения. Сначала команда выведет много информации о чтении конфигурации. Обратить внимание нужно на строку preferred, в которой перечислен порядок механизмов авторизации, которые клиент будет использовать:
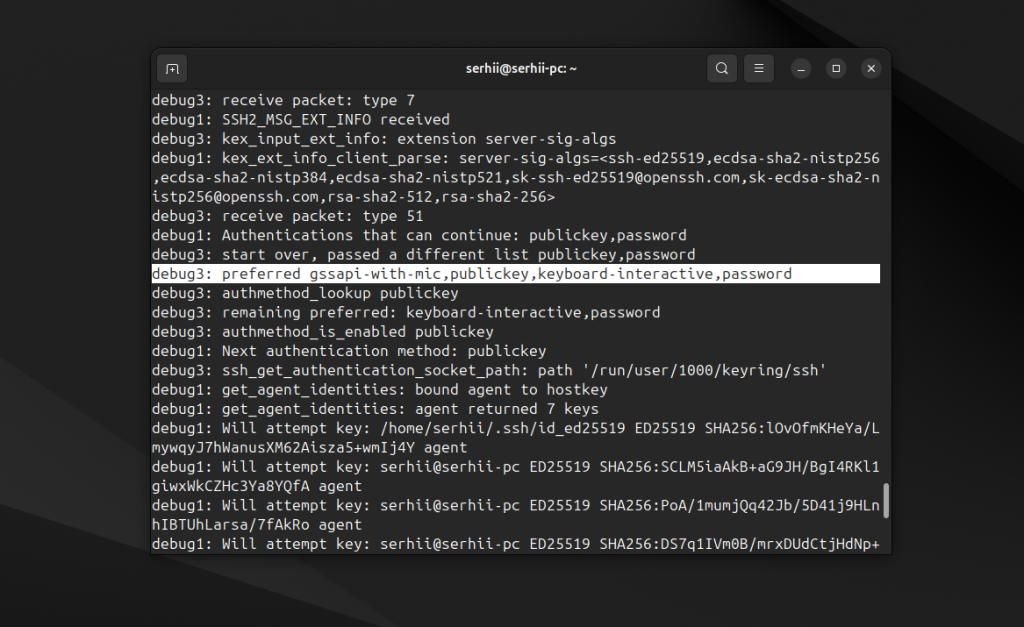
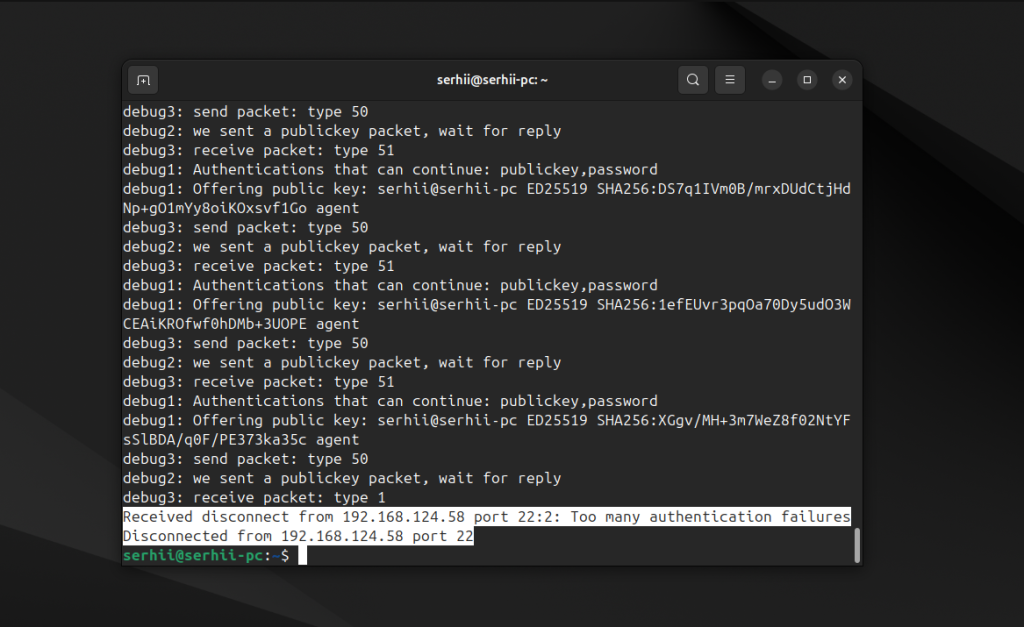
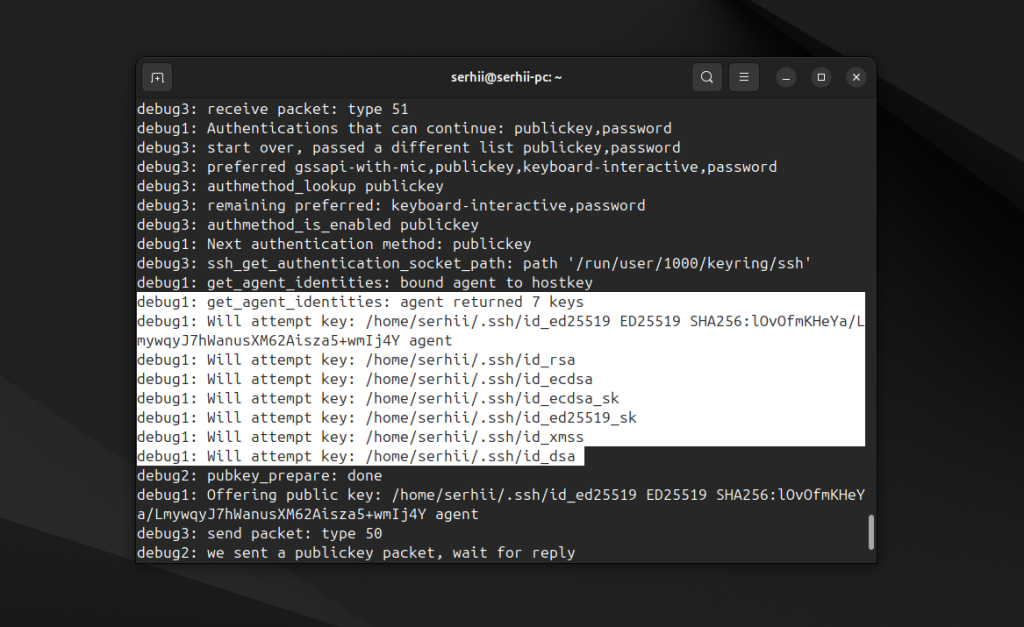
А также на процесс авторизации, какие ключи (get_agent_identities) используются, и где происходит ошибка:
Как исправить ошибку?
В этой статье я не буду рассматривать как добавить ключ на сервер, настроить там права на файл ~/.ssh/authorized_keys и тому подобное. Предположим, что сервер настроен правильно, он готов авторизовать вас по ключу или по паролю. Теперь остается понять как настроить SSH клиент так, чтобы все заработало.
1. Не перебираем все ключи
Как я и писал выше, по умолчанию SSH клиент пытается авторизоваться с помощью всех доступных в системе ключей, вот:
И соответственно получает ошибку от сервера, если первые четыре ключа не подходят. Но можно сделать по-другому. С помощью опции IdentitiesOnly можно сообщить SSH клиенту, что вы хотите, чтобы использовались только ключи, перечисленные с помощью опции IdentifyFile в конфигурации. Для этого добавьте опцию IdentitiesOnly со значением yes в файл /etc/ssh/ssh_config:
IdentitiesOnly=yes
После этого процесс авторизации будет выглядеть вот так:
Все эти ключи перечислены в том же файле /etc/ssh/ssh_config, и в следующем пункте рассмотрим как настроить свой ключ. Уже этот шаг может решить проблему с "too many authentication failures". Но если вместо неё появилась ошибка "ssh permission denied (publickey)", то двигаемся дальше.
2. Указываем ключ для авторизации
Вы можете точно указать какой ключ хотите использовать с помощью опции IdentityFile. В команду подключения нужно передать путь к файлу приватного ключа для авторизации, в моем случае ~/.ssh/id_ed25519_7:
ssh -o IdentityFile=~/.ssh/id_ed25519_7 serhii@192.168.124.58
Чтобы не добавлять эту опцию при каждом запуске команды, её можно прописать для данного хоста в файле ~/.ssh/config:
Host 192.168.124.58

IdentityFile ~/.ssh/id_ed25519_7
После этого данный ключ будет использоваться для всех SSH подключений к этому хосту.
3. Авторизуемся по паролю
Если нужно авторизоваться по паролю, но в системе есть ключи, то соответственно клиент будет перебирать сначала их, и пароль ввести не предложит. Чтобы это решить можно изменить порядок способов авторизации для данного подключения с помощью опции PreferredAuthentications, и заодно отключить на всякий случай авторизацию по ключу, и включить по паролю:
ssh -o PubkeyAuthentication=no -o PasswordAuthentication=yes -o PreferredAuthentications=password serhii@192.168.124.58
То же самое можно настроить для этого хоста в файле ~/.ssh/config:
Host 192.168.124.58

PubkeyAuthentication no
PasswordAuthentication yes
PreferredAuthentications password
4. Указываем механизм авторизации
Иногда вместо механизма авторизации password сервер может использовать keyboard-interactive. Обычно это происходит, когда для авторизации используется не пароль пользователя Unix, а пароль из какой-либо внешней службы авторизации. В таком случае команда, описанная в предыдущем пункте, работать не будет, и вместо неё нужно использовать следующую:
ssh -o PubkeyAuthentication=no -o PreferredAuthentications=keyboard-interactive serhii@192.168.124.58
И соответственно настройки для ~/.ssh/config будут немного отличаться:
Host 192.168.124.58

PubkeyAuthentication no
PreferredAuthentications keyboard-interactive
Что проверить на сервере?
1. Логи
Если у вас есть доступ к серверу, физический или в консоли VPS, то прежде всего нужно посмотреть там логи авторизации. Для того чтобы включить режим отладки для службы ssh нужно добавить такую строку в /etc/sshd_config:
LogLevel VERBOSE
После этого необходимо перезапустить службу:
sudo systemctl restart ssh
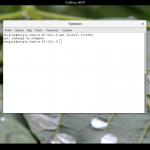
По умолчанию логи записываются в файл /var/log/auth.log:
2. Права доступа
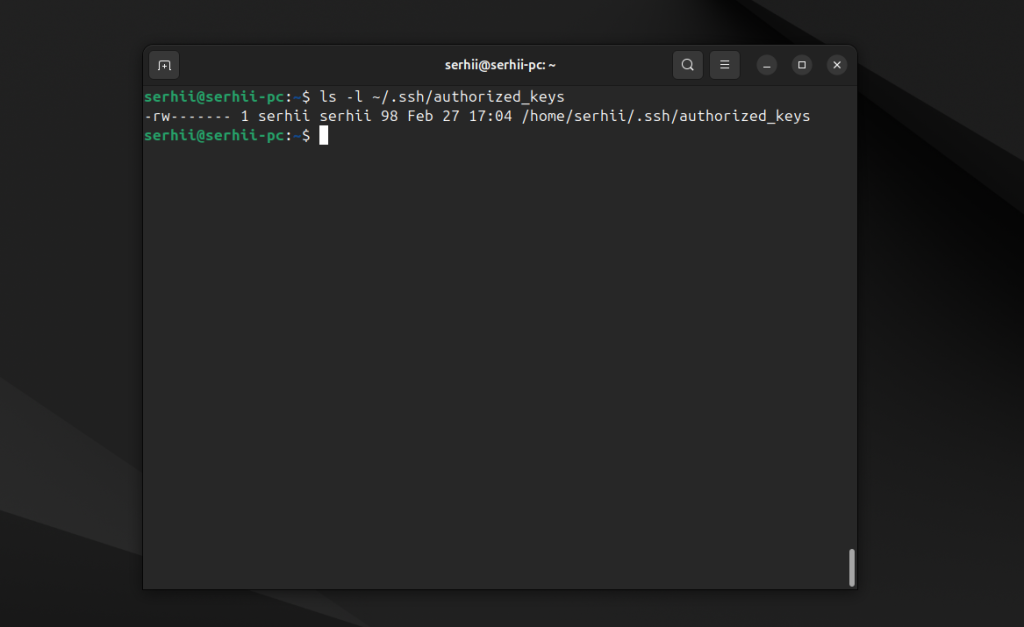
Права на файл ~/.ssh/authorized_keys должны быть 600:
ls -l ~/.ssh/authorized_keys
Выводы
В этой статье мы рассмотрели как исправить ошибку too many authentication failures и permission denied (publickey) при подключении по SSH. Я рассказал о том, как решал подобные проблемы, когда они возникали в моей работе. Возможно, существуют и другие случаи, не описанные в статье, которые приводят к такой ошибке. Если вы знаете другие методы решения, делитесь в комментариях!
Anubis – это максимально легкое open-source решение, созданное специально для защиты небольших веб-ресурсов от бесконечного потока запросов от ботов и AI парсеров. Этот инструмент можно считать "ядерным вариантом", потому что он заставляет ботов выполнять вычисления похожие на майнинг криптовалюты. Но это неплохая альтернатива для тех, кто не может или не хочет использовать Cloudflare. Посмотреть детали