В этой статье мы рассмотрим как настроить Ubuntu 24.04 после установки. На данный момент это самая новая версия дистрибутива с длительным сроком поддержки (LTS). В этой версии мы получили новый App Center, утилиту для обновления проприетарных прошивок, GNOME 46 со всеми его улучшениями, такими как обновленный файловый менеджер, улучшенная программа настроек, обновленное меню быстрых настроек, и многое другое.
При написании этой статьи использовалась Ubuntu 24.04.1, которая получила еще несколько незначительных улучшений, но версия GNOME и основных программ осталась та же, что и при релизе. Как и всегда, мы рассмотрим настройку среды рабочего стола, установку дополнительных расширений и программ. Там, где это возможно, буду стараться писать не только о настройках в графическом интерфейсе, но и команды терминала, для того чтобы это можно было сделать быстрее.
Содержание статьи
Настройка Ubuntu 24.04 после установки
Шаг 1. Обновление системы
Прежде всего следует обновить все пакеты в системе до новой версии. Сначала обновим пакеты из deb репозиториев. Для этого выполните следующие команды в терминале:
sudo apt update
sudo apt upgrade -y
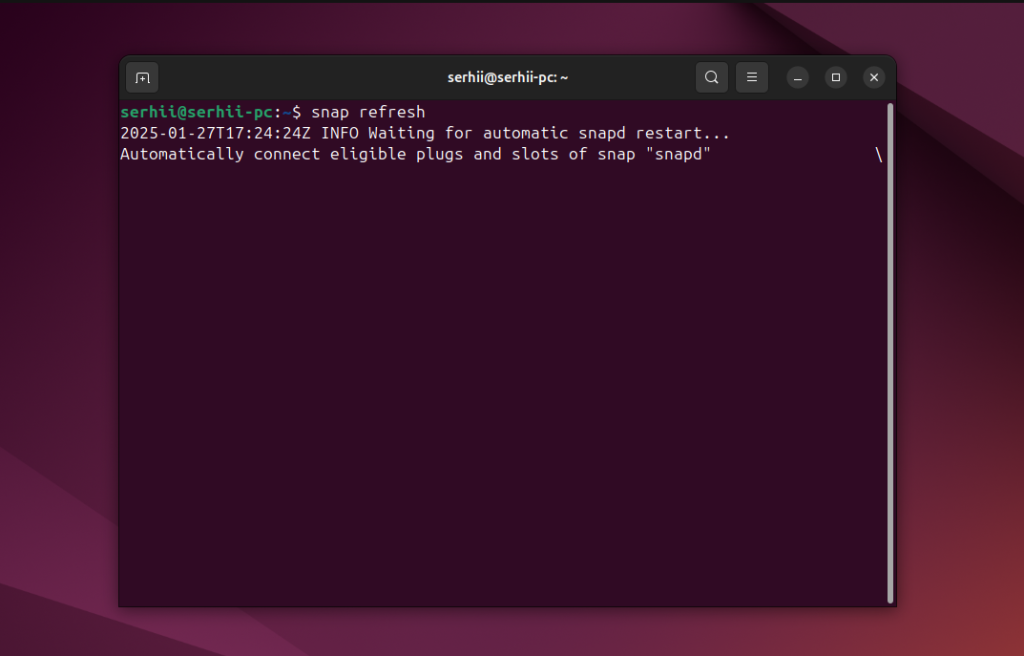
В Ubuntu также используется универсальный формат пакетов Snap. Для их обновления нужно выполнить следующую команду:
sudo snap refresh
Шаг 2. Настройка дополнительных репозиториев
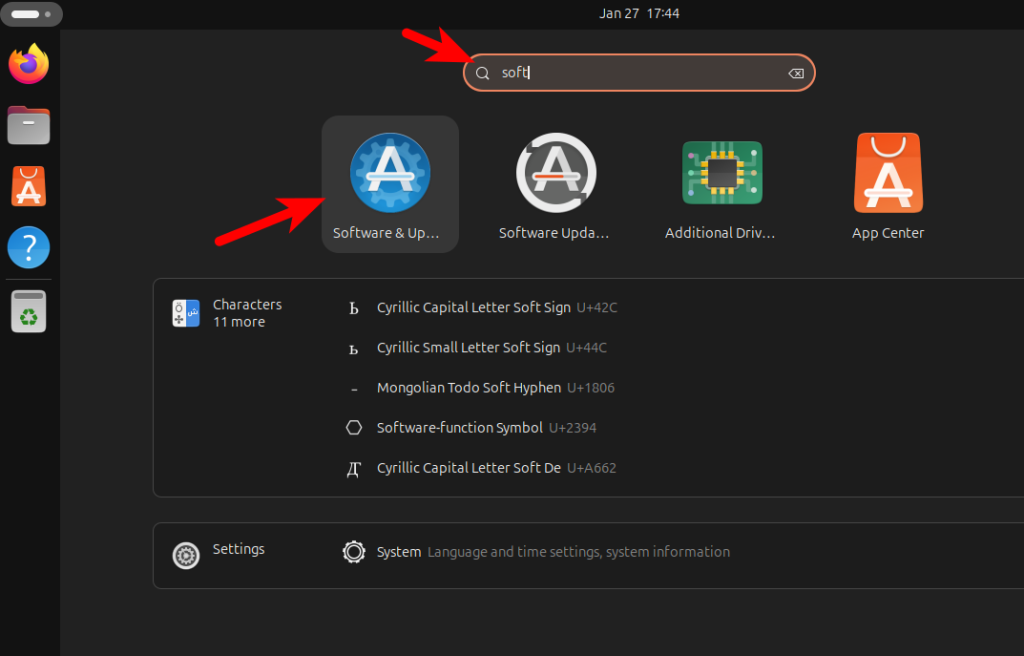
По умолчанию, если во время установки Ubuntu вы не включили опцию Install third-party software for graphics and WiFi hardware, в системе будет присутствовать только один репозиторий со свободным программным обеспечением, поддерживаемым командой Canonical. Этот репозиторий называется main. Но есть еще несколько репозиториев, поддерживаемых сообществом (universe) и содержащих проприетарные программы (restricted и multiverse). Чтобы их включить откройте главное меню и наберите Software & Updates:
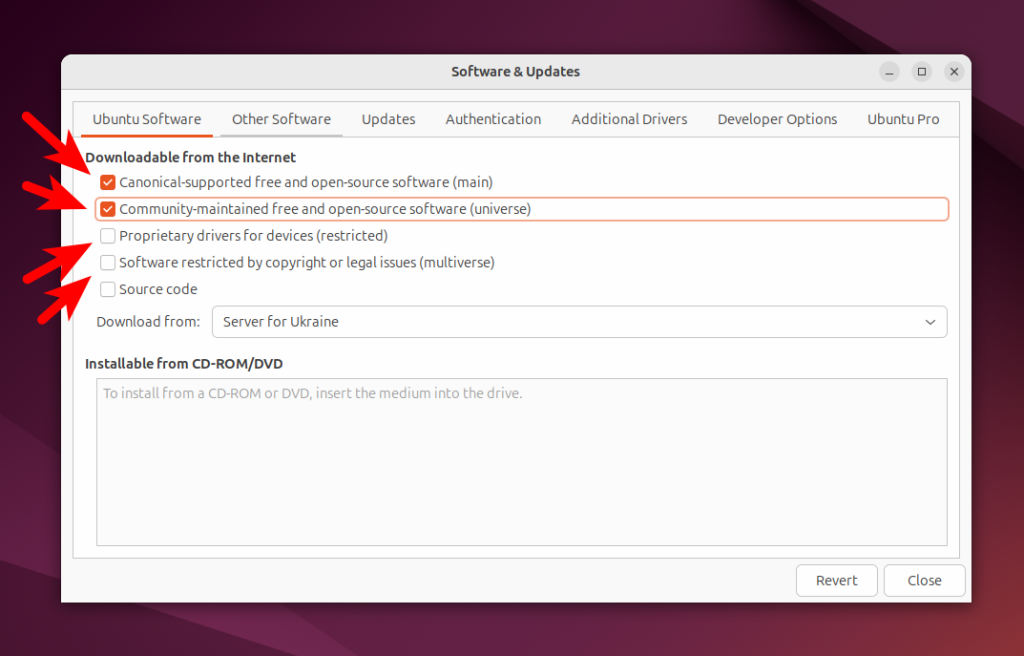
Запустите программу и перейдите на вкладку Ubuntu Software. Здесь необходимо поставить галочки напротив соответствующих репозиториев - universe, restricted и multiverse:
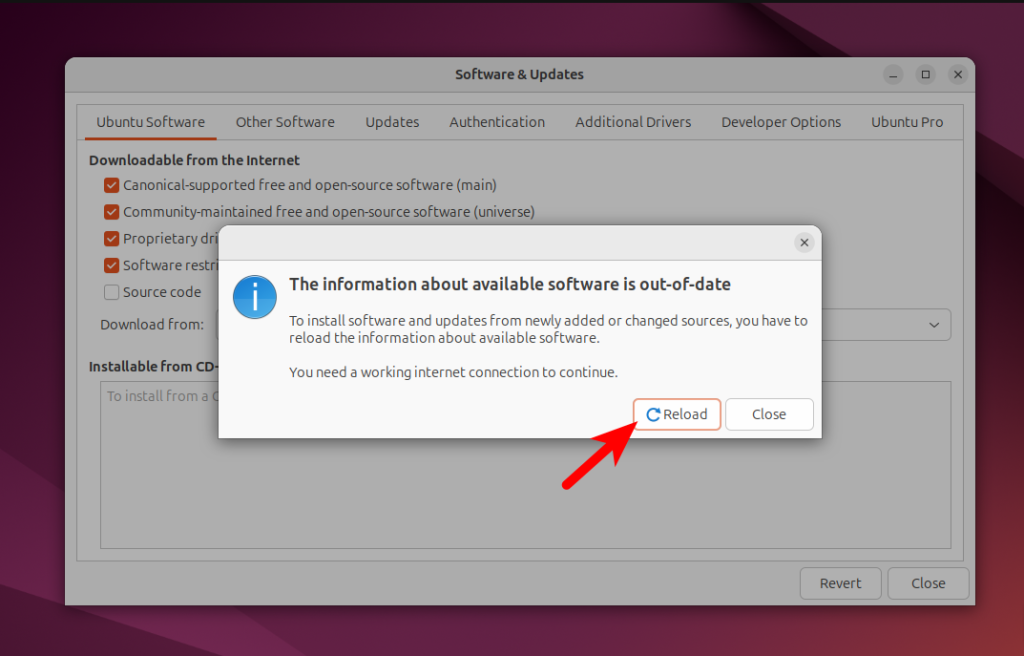
Для того чтобы изменения применились будет необходимо ввести пароль пользователя. Также когда вы попытаетесь закрыть программу, она предложит обновить списки пакетов в репозиториях. Здесь нужно нажать кнопку Reload:
Для того чтобы сделать то же самое в терминале, выполните:
sudo add-apt-repository universe
sudo add-apt-repository multiverse
sudo add-apt-repository restricted
Шаг 3. Настройка рабочего стола
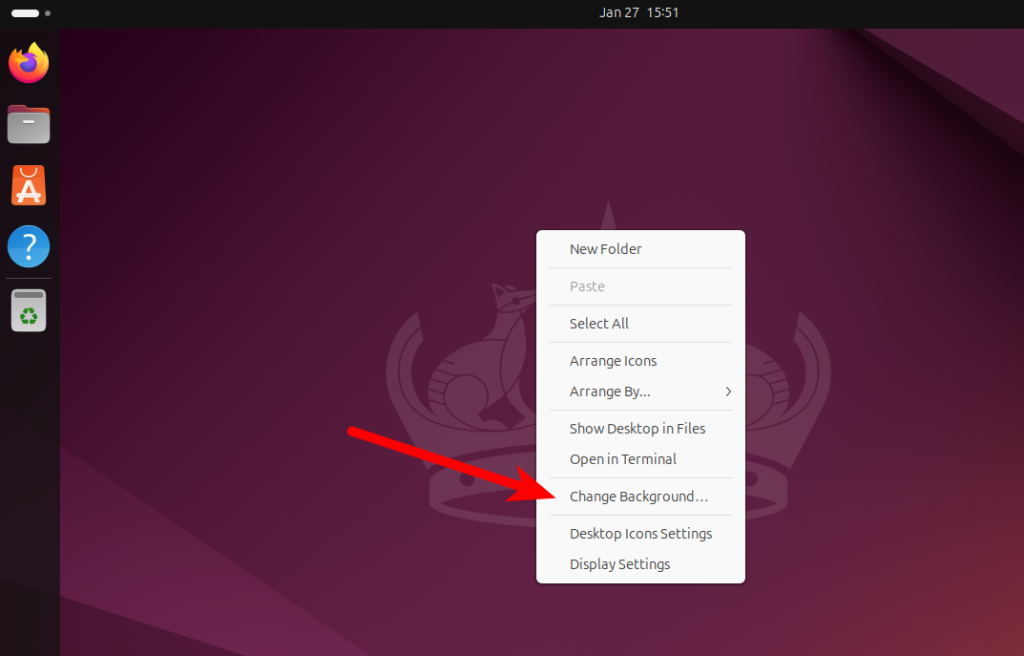
Для того чтобы изменить фон рабочего стола, кликните по любому свободному месту на нем правой кнопкой мыши и выберите Change Background:
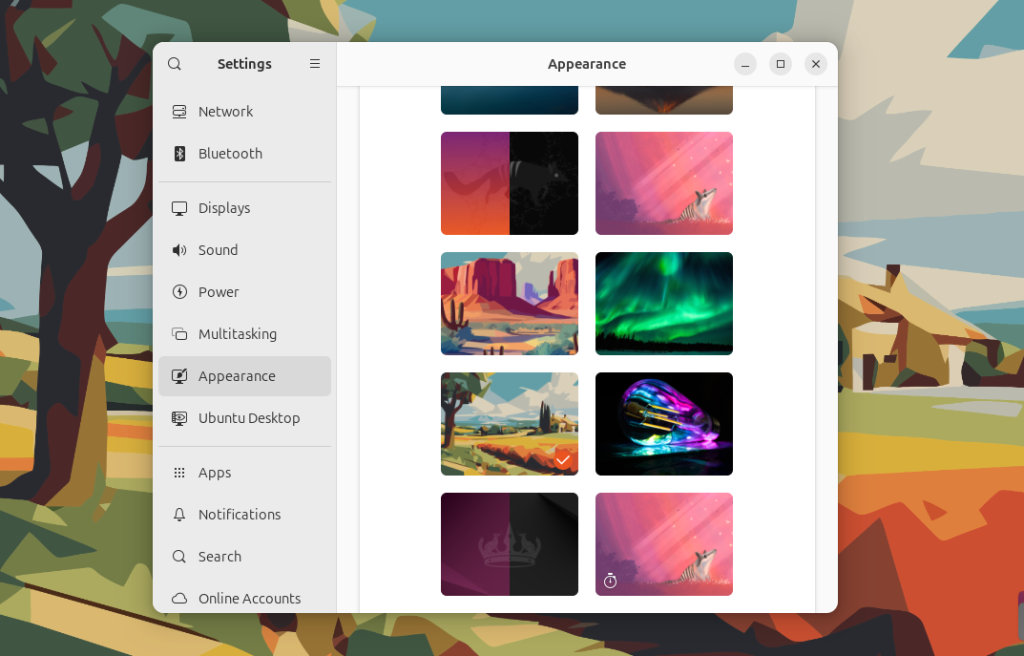
Здесь в разделе Background можно выбрать изображение, например с скалами:
То же самое изображение можно установить с помощью следующей команды терминала:
gsettings set org.gnome.desktop.background picture-uri 'file:///usr/share/backgrounds/Monument_valley_by_orbitelambda.jpg'
Также в этом окне можно изменить акцентный цвет системы с помощью пункта Color, а также включить тёмный режим в разделе Style:

Тёмный режим также можно включить с помощью следующей команды:
gsettings set org.gnome.desktop.interface color-scheme prefer-dark
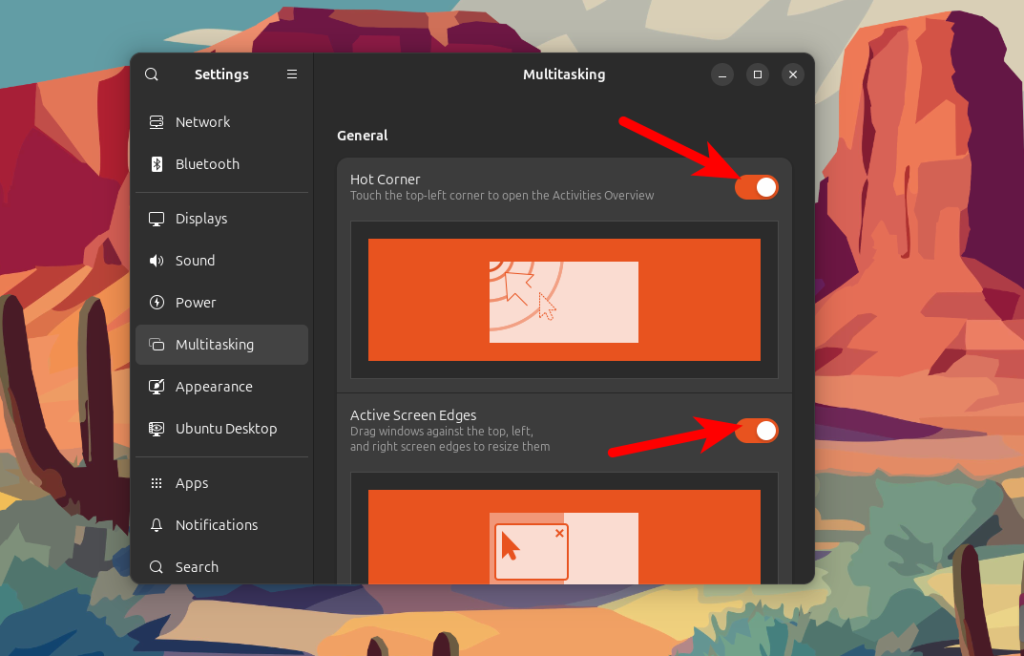
Далее перейдите на вкладку Multitasking. Здесь можно включить опцию Hot corner, которая будет открывать главное меню при наведении курсора мыши в левый верхний угол. Также здесь можно включить Active Screen Edges для того чтобы при подведении окна к краю экрана система автоматически предлагала увеличить его до половины размера экрана:
То же самое можно сделать с помощью команд:
gsettings set org.gnome.desktop.interface enable-hot-corners true
gsettings set org.gnome.mutter edge-tiling true
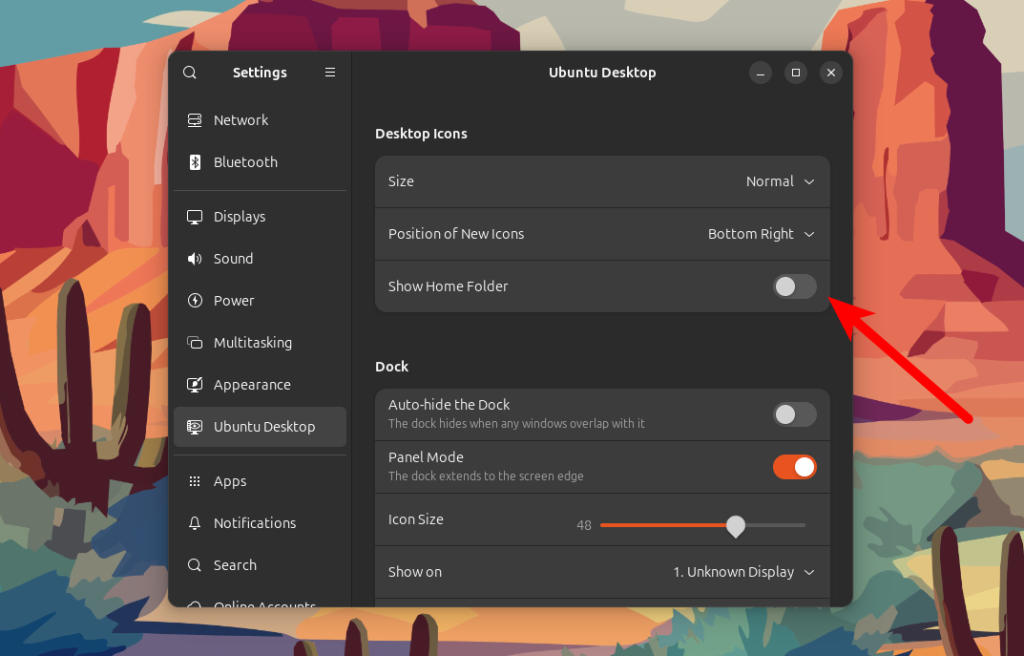
Кроме того, на вкладке Ubuntu Desktop можно отключить отображение ярлыка домашней папки на рабочем столе. Для этого выключите переключатель Show Personal Folder:
gsettings set org.gnome.shell.extensions.ding show-home false
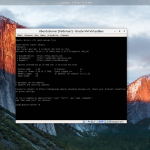
Шаг 4. Настройка терминала
По умолчанию в Ubuntu используется Gnome Terminal, который использует GTK3 и не поддерживает некоторых функций, уже присутствующих в современных терминалах, разработанных на основе GTK4. Ранее я рекомендовал GNOME Console (KGX). Он не поддерживает настройку тем и цветов, а в Ubuntu 23.10 разработчики решили сделать его фон фиолетовым, что мне, например, не нравится. В качестве альтернативы можно установить BlackBox:
sudo apt install blackbox-terminal
Этот эмулятор терминала имеет множество настроек, несколько тем оформления, в том числе и фиолетовую, окно просмотра всех вкладок, настройки шрифтов. Благодаря использованию GTK4 хорошо вписывается в интерфейс GNOME, подсвечивает заголовок окна красным при редактировании файлов с правами суперпользователя, и фиолетовым для удаленных подключений:
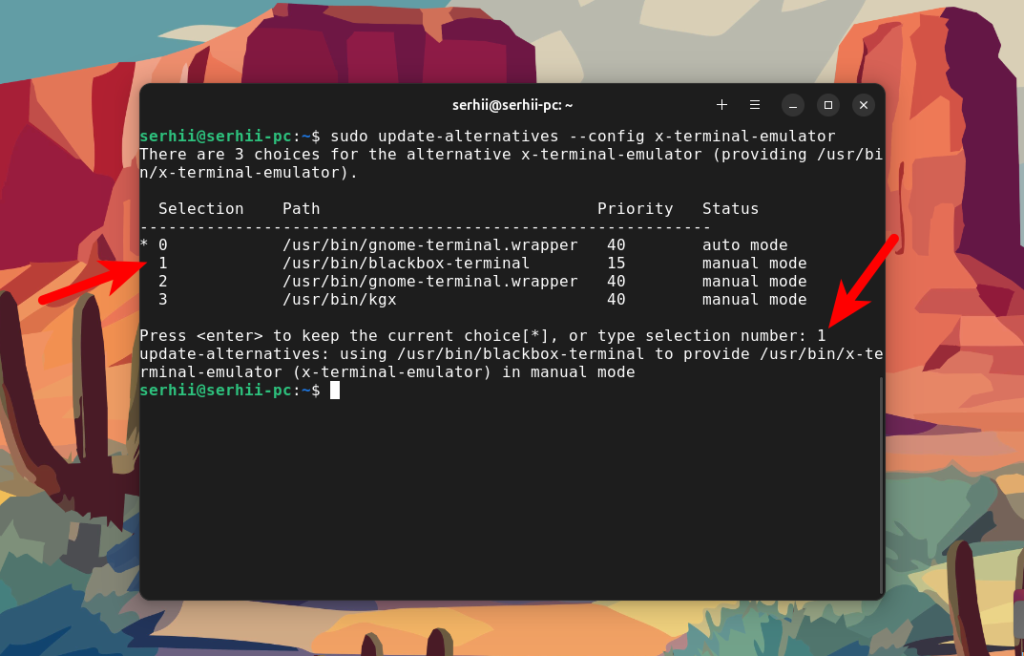
Для того чтобы использовать этот эмулятор терминала по умолчанию выполните скрипт update-alternatives и выберите /usr/bin/blackbox-terminal:
sudo update-alternatives --config x-terminal-emulator
Шаг 5. Настройка Nautilus
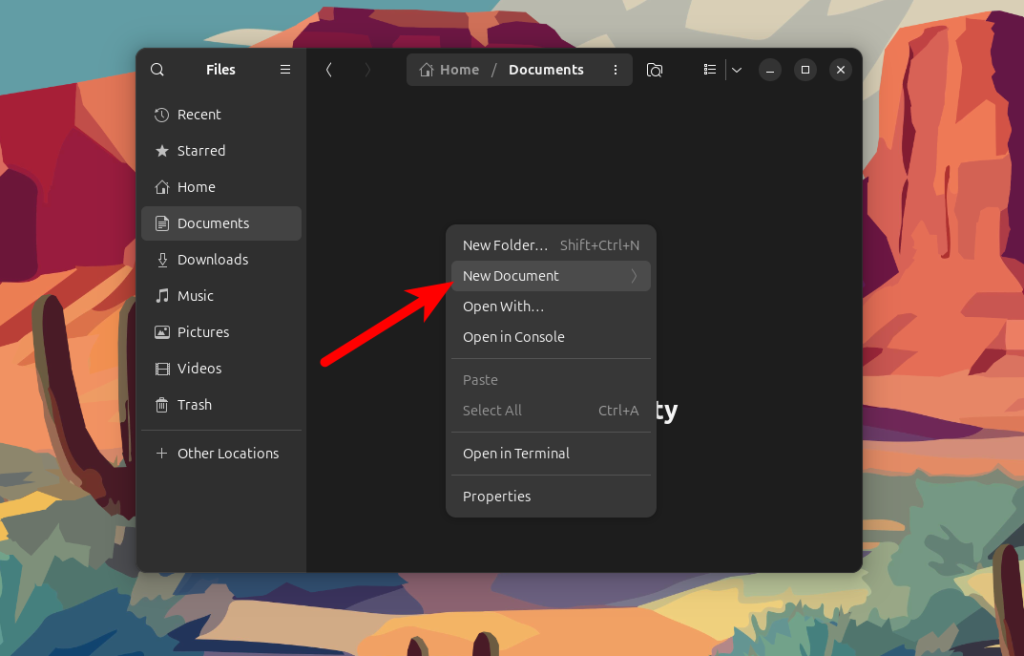
В Windows можно создавать пустые файлы в папках или на рабочем столе с помощью контекстного меню. То же самое можно делать в Nautilus, но для этого нужно добавить шаблоны файлов которые вы хотите создавать в каталог Templates в вашем домашнем каталоге. Например, давайте добавим пустой файл txt:
touch ~/Templates/new_file.txt
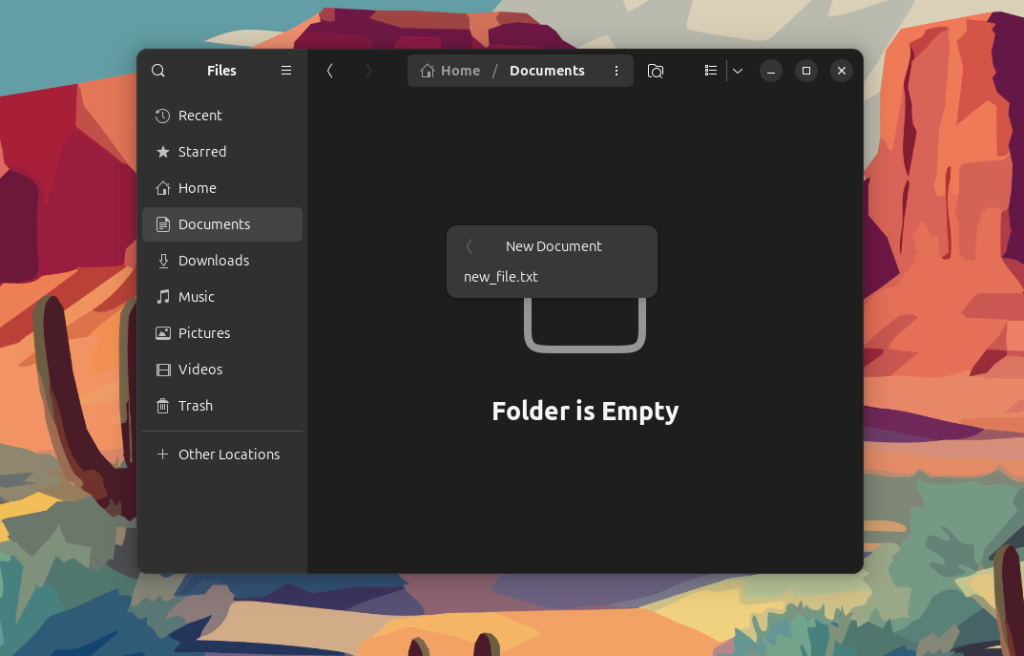
После этого в контекстном меню появится новый пункт New Document:
После клика по которому откроется список доступных шаблонов. Достаточно кликнуть по шаблону чтобы создать новый файл:
Шаг 6. Отключение режима сна
Если вы оставите компьютер более чем на 15 минут, он будет переходить в режим сна для экономии энергии. Чтобы это отключить, откройте утилиту Settings, перейдите в раздел Power и выключите опцию Automatic Suspend.
Также это можно сделать с помощью gsettings:
gsettings set org.gnome.settings-daemon.plugins.power sleep-inactive-ac-timeout 0
Сейчас вы изменили настройки только для текущего пользователя. Но когда вы включили компьютер, и не авторизуетесь в течение 15 минут, он всё равно будет переходить в режим сна. Это происходит потому что экран входа запускается от имени пользователя GDM. Для того чтобы и это исправить, нужно выполнить такую же команду от имени этого пользователя:
sudo -u gdm dbus-run-session gsettings set org.gnome.settings-daemon.plugins.power sleep-inactive-ac-timeout 0
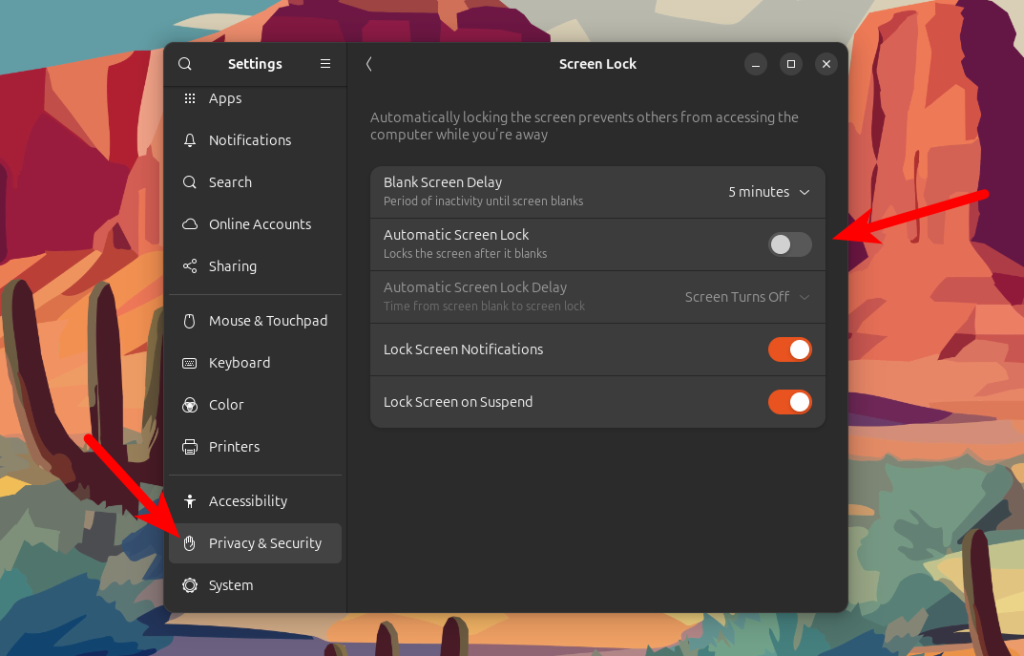
Шаг 7. Отключение блокировки экрана
По умолчанию сессия пользователя будет блокироваться через 5 минут бездействия. Чтобы это отключить откройте утилиту Settings, перейдите в Privacy & Security и выберите Screen Lock:
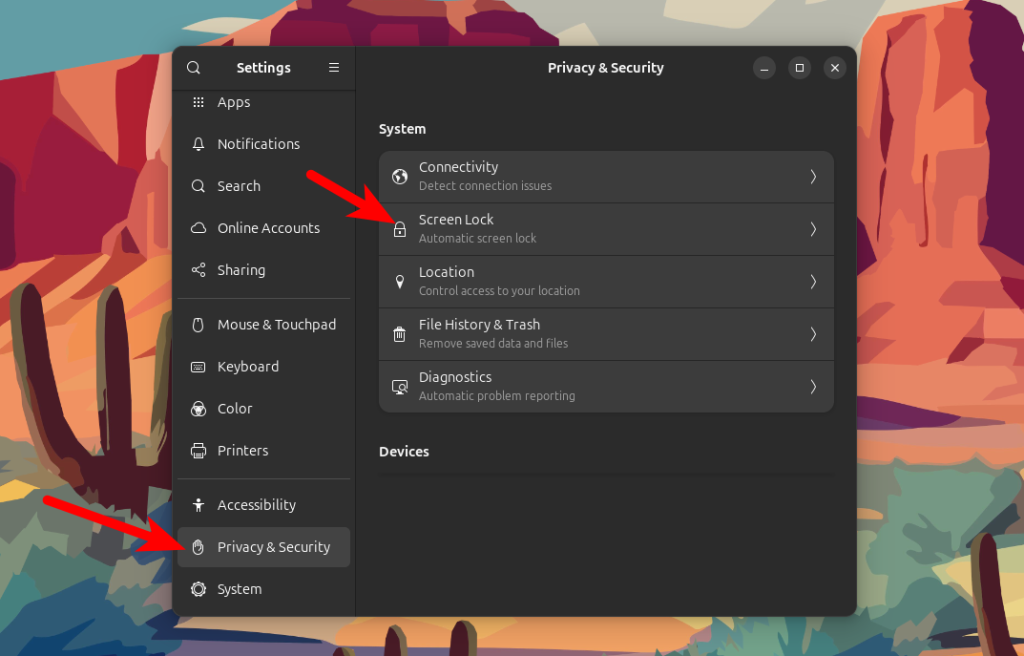
Далее необходимо отключить опцию Automatic Screen Lock:
Или же выполните команду:
gsettings set org.gnome.desktop.screensaver lock-enabled false
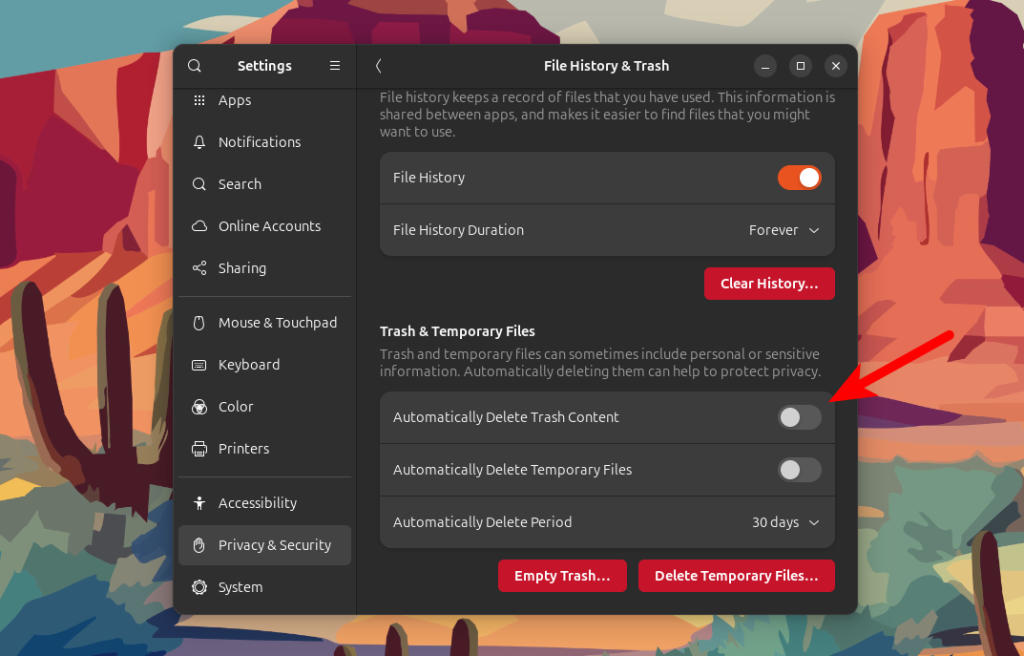
Шаг 8. Автоматическая очистка корзины
По умолчанию корзина не очищается и вам придется очищать её вручную когда места на диске не останется. Но можно настроить автоматическую очистку. Например удалять файлы, которые были отправлены в корзину ранее чем 30 дней назад. Для этого в том же разделе Privacy & Security выберите File History & Trash и в разделе Trash & Temporary Files включите опцию Automatically Delete Trash Content:
То же самое можно включить с помощью команды:
gsettings set org.gnome.desktop.privacy remove-old-trash-files true
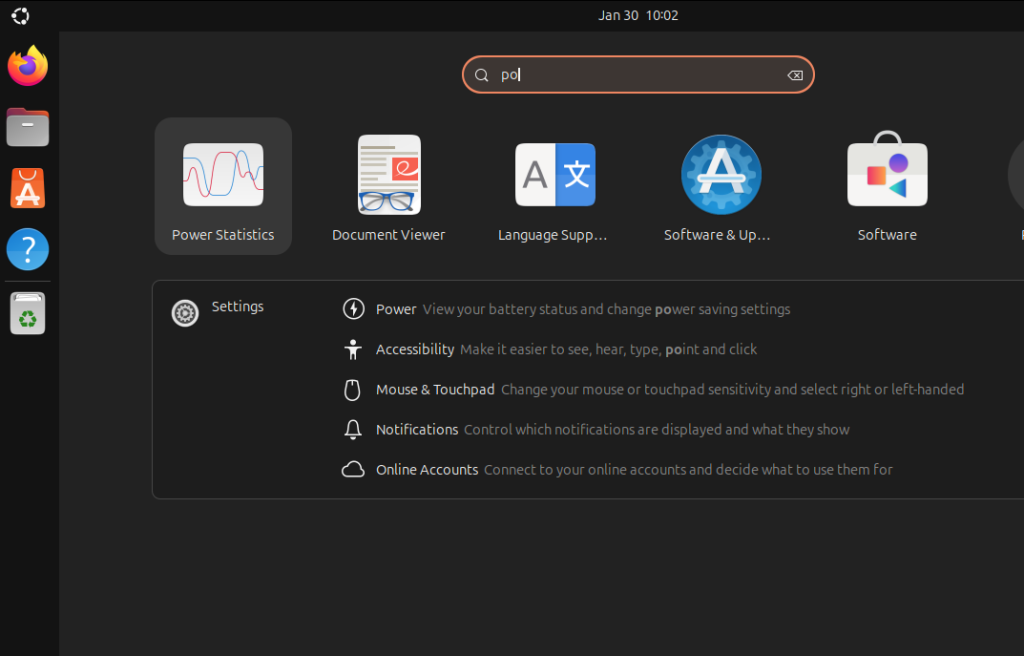
Шаг 9. Настройка поиска
В GNOME есть функция поиска на главном экране, которая позволяет искать не только программы, но и файлы, папки, окна терминала, настройки, пароли, символы, а также даже может выполнять простые вычисления в калькуляторе. Если вы хотите сделать поиск быстрее, то можете убрать лишние программы из поиска. Для этого откройте раздел Search и в списке Search Results отключите ненужные программы:
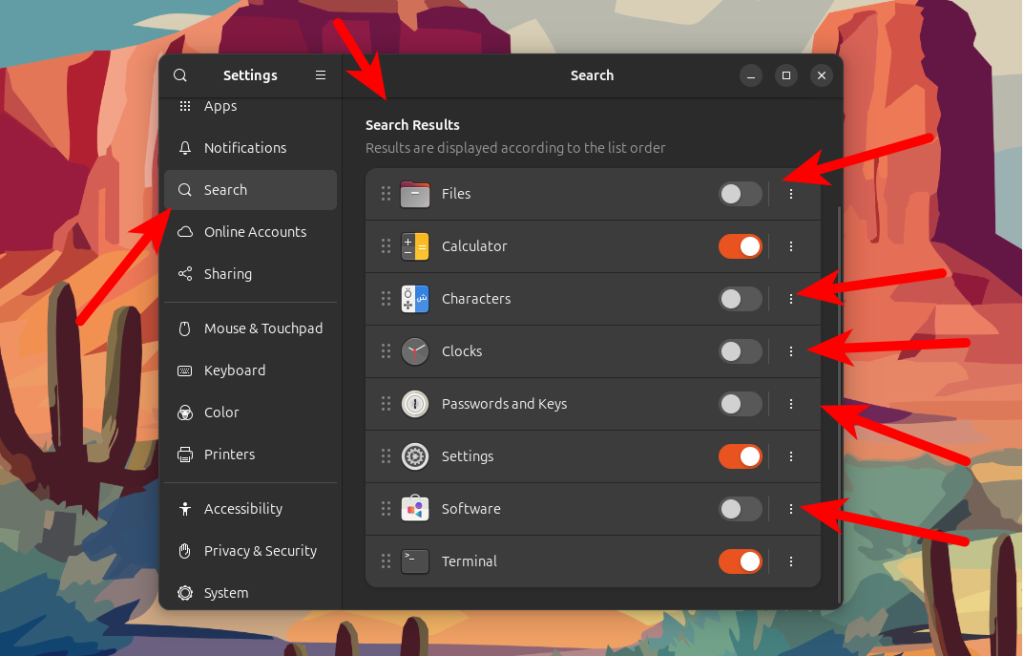
Например, я оставил только настройки, калькулятор и терминал. Этот список нужно будет пересмотреть после установки программ, GNOME будет автоматически показывать результаты поиска из всех программ, которые это поддерживают. Вот результат:
Шаг 10. Установка Gnome Tweaks
Если вы хотите иметь возможность менять дополнительные тонкие настройки GNOME, такие как темы и поведение оболочки в графическом интерфейсе, то вам понадобится программа gnome-tweaks. Установить её можно с помощью следующей команды:
sudo apt install gnome-tweaks
Для этой задачи еще можно использовать программу Refine, но во-первых, для ее установки нужно добавить в систему Flatpak, а во-вторых утилита рассчитана на работу с чистым GNOME.
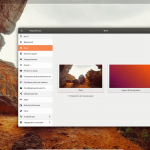
Шаг 11. Установка Extension Manager
Раньше для установки расширений GNOME нужно было ставить специальный пакет коннектор и расширение для браузера. Теперь это можно сделать намного проще с помощью программы Extension Manager, здесь можно настраивать уже установленные расширения и устанавливать новые. Программу можно установить из официальных репозиториев:
sudo apt install gnome-shell-extension-manager
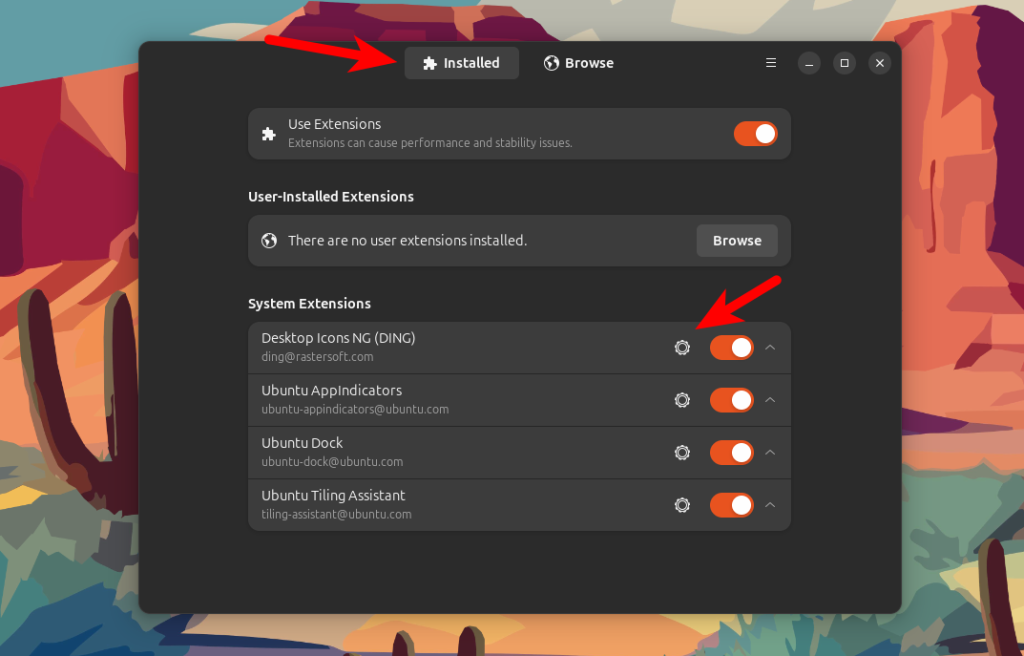
На вкладке Installed можно управлять уже установленными расширениями и менять их настройки:
Для того чтобы установить новые расширения, перейдите на вкладку Browse и начните вводить название расширения. Например Logo Menu:
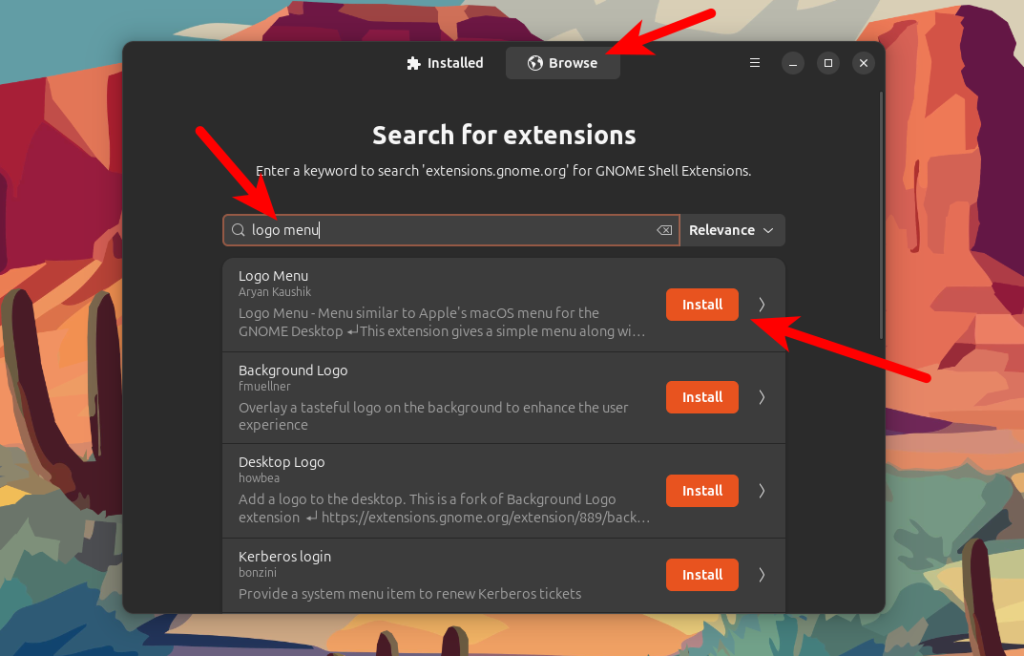
Когда расширение найдено, достаточно нажать кнопку Install и подтвердить установку в диалоговом окне. После этого расширение появится на первой вкладке и будет активировано.
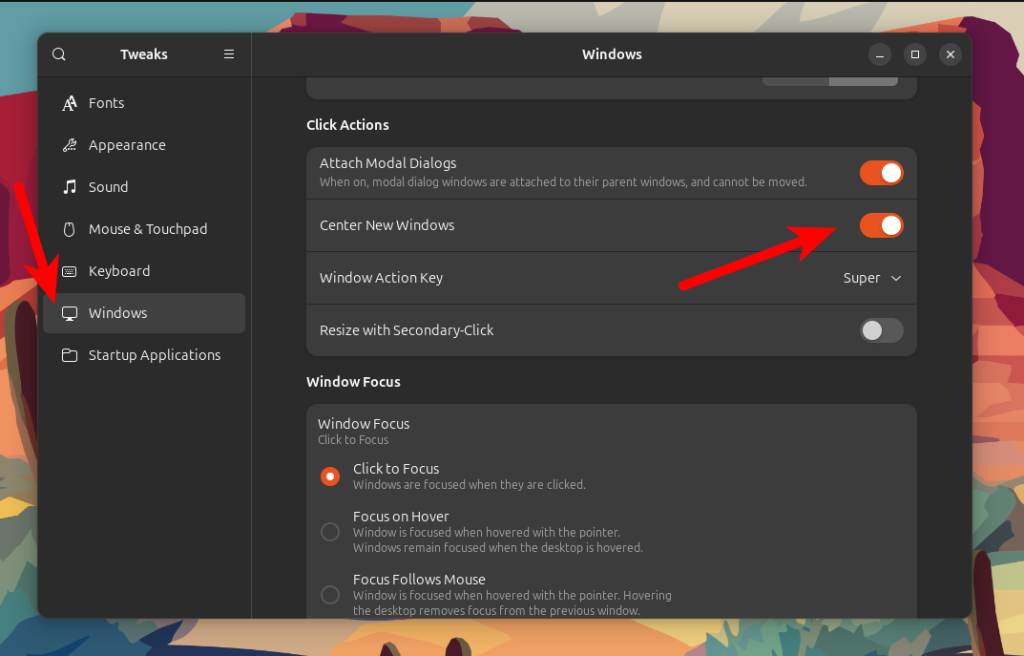
Шаг 12. Открытие новых окон по центру
По умолчанию все окна открываются в левом верхнем углу. Если вы хотите чтобы новые окна открывались по центру, откройте Gnome Tweaks, перейдите на вкладку Windows и включите Center New Windows в разделе Click Actions:
Также это можно сделать с помощью команды:
gsettings set org.gnome.mutter center-new-windows true
Шаг 13. Вернуть кнопки свернуть/развернуть
На той же вкладке в Gnome Tweaks можно вернуть кнопки сворачивания и разворачивания окна с помощью соответствующих пунктов Minimize и Maximize в разделе Titlebar Buttons:
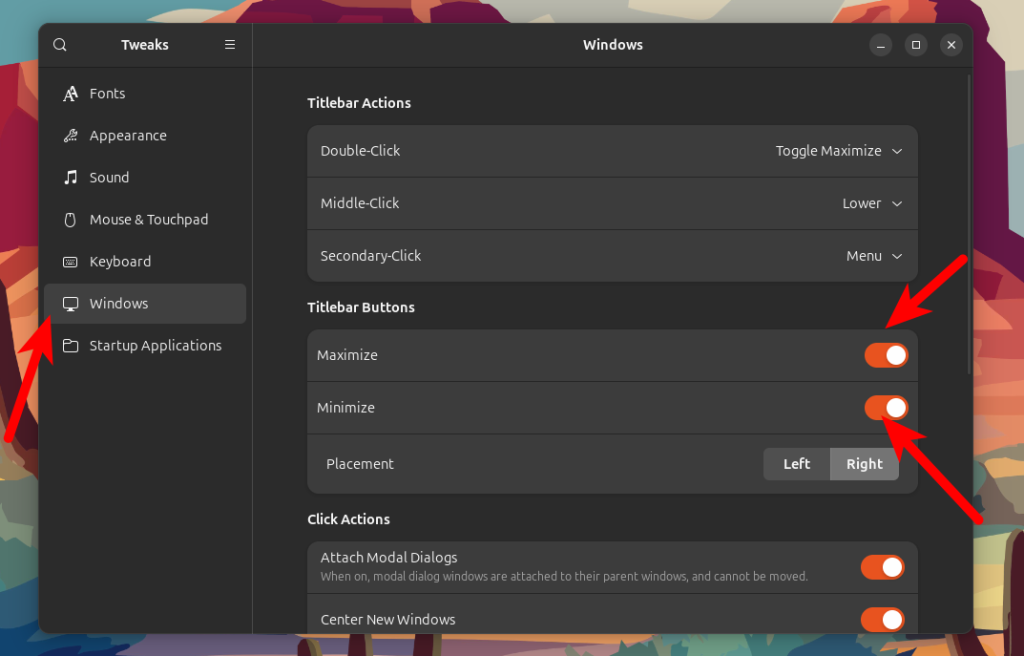
Или выполните команду:
gsettings set org.gnome.desktop.wm.preferences button-layout appmenu:minimize,maximize,close
Шаг 14. Сворачивание по клику
В Ubuntu Unity ранее была возможность сворачивать окна кликом по ярлыку программы на панели Dash. Для того чтобы включить эту функцию сейчас выполните следующую команду:
gsettings set org.gnome.shell.extensions.dash-to-dock click-action 'minimize'
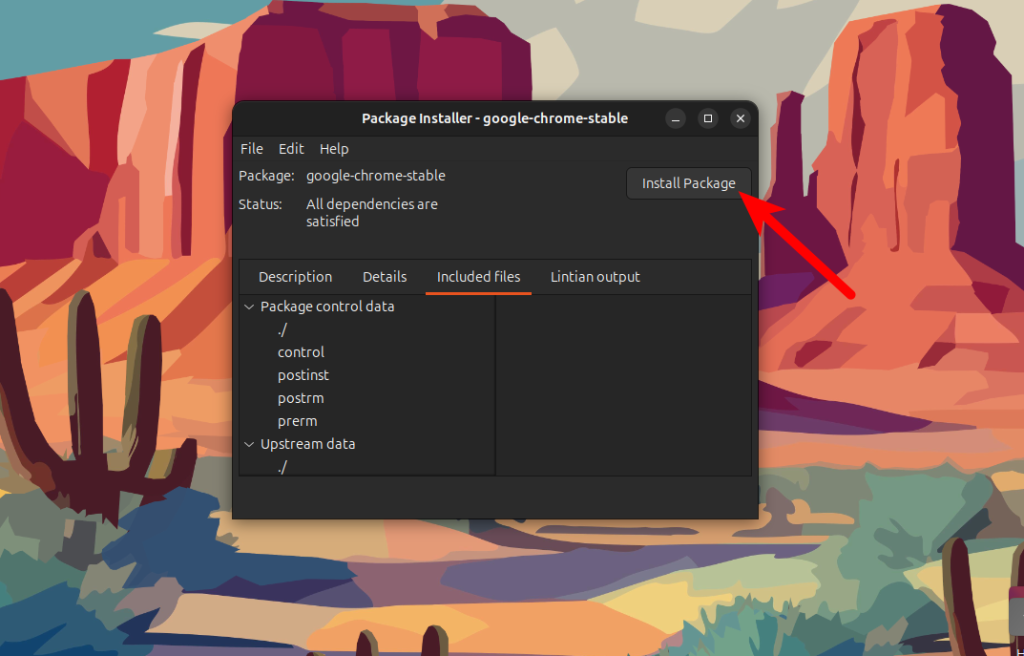
Шаг 15. Установка GDebi
В Ubuntu 24.04 был добавлен новый центр приложений, и вместе с тем сломана установка локальных deb пакетов по клику в файловом менеджере. Теперь файловый менеджер будет выдавать ошибку о том, что не знает какой программой открыть файл. Разработчики собираются добавить поддержку deb в будущих версиях, а пока можно использовать gdebi. Для установки программы выполните:
sudo apt install gdebi
После этого достаточно открыть файл пакета с помощью gdebi и нажать кнопку Install Package и дождаться завершения установки:
Шаг 16. Поддержка старых версий AppImage
Проблема с AppImage программами в Ubuntu существует уже давно, поскольку AppImage использует устаревшую библиотеку fuse2, которая в новых версиях Ubuntu была заменена на fuse3. Похоже, новые пакеты, собранные с помощью новой версии инструментов AppImageKit, должны работать без каких-либо проблем. Но все еще существует большое количество старых пакетов. Для того чтобы они тоже работали, необходимо установить libfuse2:
sudo apt install libfuse2t64
Шаг 17. Установка Flatpak
Поскольку Canonical продвигает свой формат универсальных пакетов Snap, поддержки пакетов Flatpak в системе нет. Далеко не все программы можно установить из официальных репозиториев и Snap. Если вам нужна какая-то программа из GNOME Circle, то есть большая вероятность, что вам придется использовать Flatpak. Для его установки выполните следующую команду:
sudo apt install flatpak
После этого необходимо добавить репозиторий Flatpak пакетов Flathub:
flatpak remote-add --if-not-exists flathub https://flathub.org/repo/flathub.flatpakrepo
А для того чтобы иметь возможность устанавливать Flatpak пакеты в графическом интерфейсе вам понадобится Gnome Software:
sudo apt install gnome-software-plugin-flatpak gnome-software
Шаг 18. Установка мультимедиа кодеков
Если во время установки Ubuntu вы не поставили галочку напротив пункта с установкой медиа кодеков, то это стоит сделать сейчас. Но перед этим убедитесь, что вы включили репозиторий multiverse на втором шаге. Просто выполните команду:
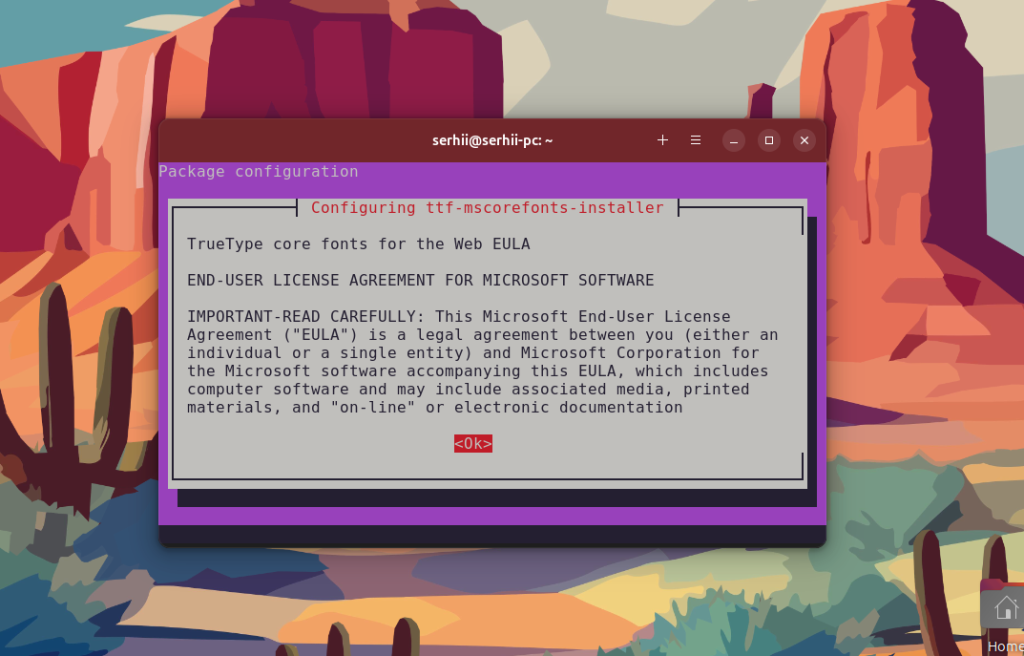
sudo apt install ubuntu-restricted-extras
Для того чтобы установить также дополнительные шрифты вам нужно будет принять лицензию ELUA:
Шаг 19. Дополнительные раскладки клавиатуры
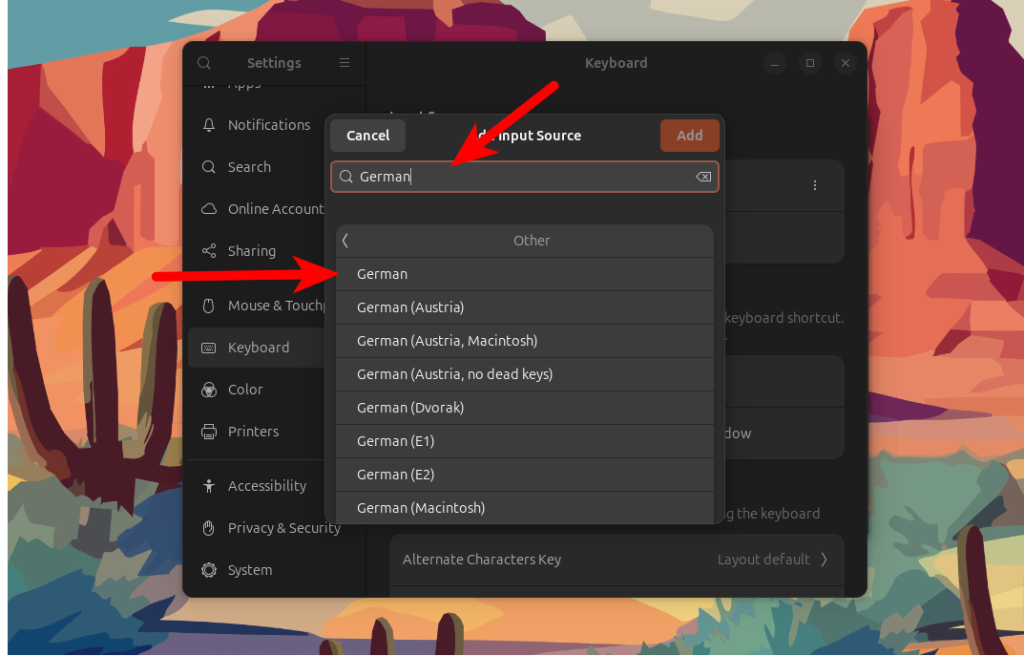
Если вы используете несколько языков, то скорее всего вам нужно будет добавить несколько раскладок клавиатуры. Для этого откройте Settings и перейдите на вкладку Keyboard и в разделе Input Sources нажмите кнопку + Add Input Source:
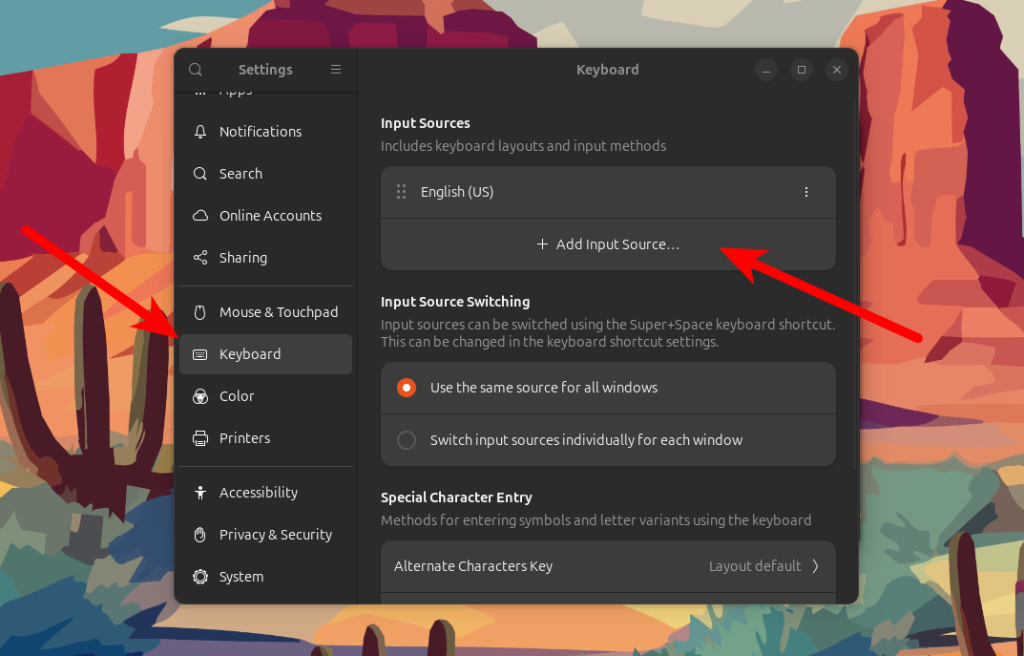
Если нужного языка нет в списке, нажмите кнопку с тремя точками (More...). А если и там нет, то и кнопку Other. Далее в поиске можно набрать язык который вы хотите добавить, например Немецкий, и останется только выбрать нужную раскладку из списка и нажать кнопку Add.
После этого он появится в списке:
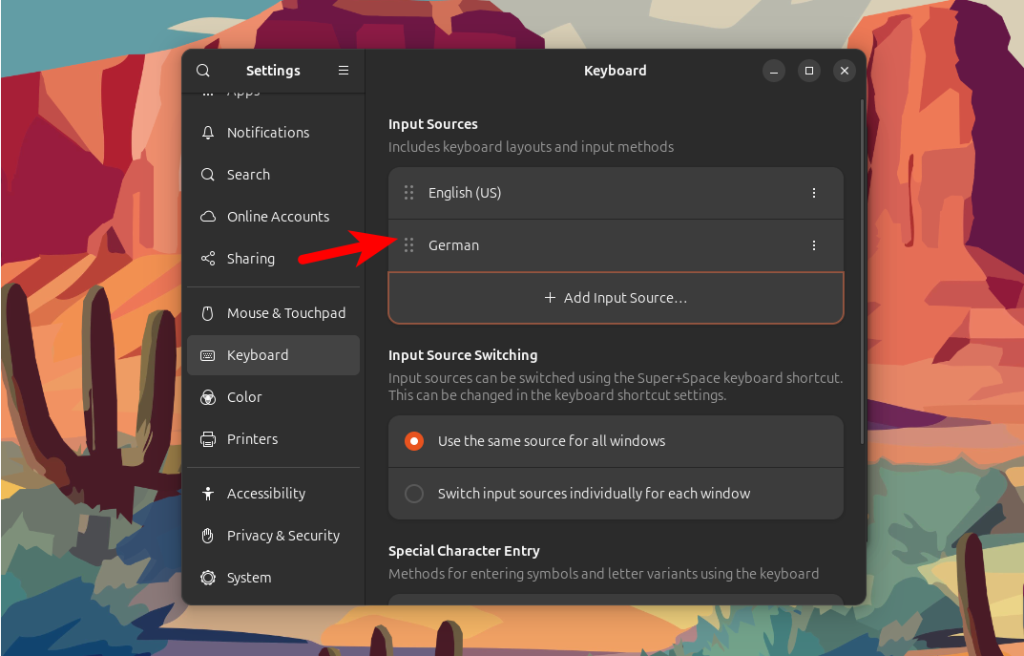
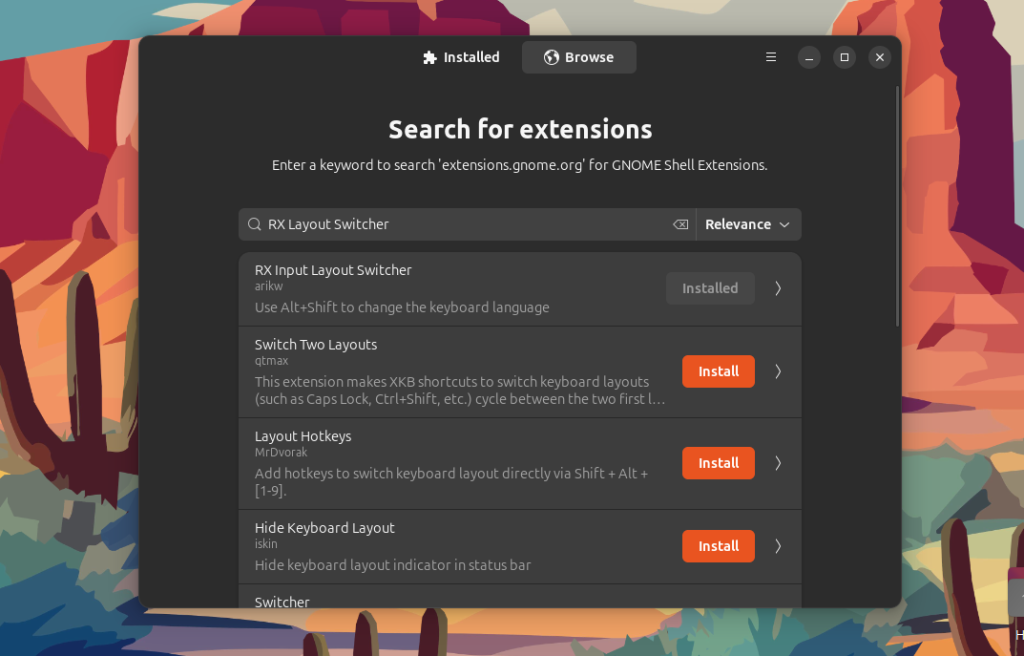
Если вы хотите переключать раскладки клавиатуры с помощью сочетания клавиш Alt+Shift, установите расширение GNOME - RX Input Layout Switcher:
Шаг 20. Установка необходимых программ
Остается установить еще несколько программ, которые могут понадобиться во время использования системы. Как это делать - выбирать вам. Часть программ есть в официальных репозиториях, часть в AppCenter, а другие на FlatHub. Вот список программ, которые я обычно использую:
- VLC - один из лучших видео плееров
- Gimp - редактор изображений
- Obsidian - программа для заметок в Markdown
- Parabolic - программа для загрузки видео из интернета
- Mission Center - аналог диспетчера задач
- Flatseal - управление правами и доступом для пакетов Flatpak
- Transmission - торрент клиент
- KeePassXC - менеджер паролей
- Amberol - аудиоплеер
Также можно установить несколько полезных консольных программ:
- ncdu - позволяет найти самые большие файлы в файловой системе и освободить место на диске
- rg - поиск по содержимому файлов вместо grep
- htop - диспетчер задач в терминале
- tmux - терминальный мультиплексор
- unrar - утилита для распаковки rar
- p7zip - утилита для распаковки p7zip
sudo apt install ncdu ripgrep htop tmux unrar p7zip
Выводы
В этой статье мы рассмотрели как настроить Ubuntu 24.04 после установки. Как видите в системе есть довольно много моментов которые можно исправить, как минимум добавить дополнительные способы установки программ, такие как Flatpak, поддержку AppImage и установку локальных deb пакетов. А какие настройки делаете вы? Если что-то пропущено, делитесь в комментариях под статьей.
Действительно, устанавливая Убунту приходится подводить её под себя. По первой хотелось написать скрипт который делал бы всё это за пользователя. Но в итоге скрипты ломаются от старой к новой версии, так что руками выходит всё таки проще. Спасибо что рассмотрели всё подробно!
Спасибо за настройку! Почему только при обьеме ssd 240гб 24.04. видит 1.2 Тб? В ранних версиях не было вроде...
Для пакета «gnome-shell-extension-manager» не найден кандидат на установку
Такой пакет в Ubuntu 24.04 есть, находится в репозитории universe. Вот - https://launchpad.net/ubuntu/noble/+package/gnome-shell-extension-manager
Был когда-то прекрасный сайт, где было много актуальной и полезной информации. Очень жалко, что админ забросил его
Автору большое спасибо за сайт и материалы и творческих успехов, очень понятное и доступное изложение материала, а самое главное рабочее! По любым вопросам на про Linux всегда сперва на losst.pro)
Здравствуйте! Установил недавно voyager linux (основан на Убунту 24.04 ) после установки обновлений вылетает звук. То есть проигрываю я локальный файл видео проигрывается, а вот аудио нет. Открываю рутуб ли, ютюб - без разницы звука нет. На одном винчестере установлен Alt Linux он проигрывает файлы без нареканий. Подскажите куда копать?
Здравствуйте. Сложно что-то посоветовать, потому что со звуком в современных дистрибутивах Linux детально не разбирался. Думаю как минимум надо смотреть в настройки звука в Settings. Там можно выбрать устройство вывода, например, HDMI или звуковая карта ПК плюс там есть возможность протестировать отдельно каждую колонку.
Самое интересное знаете, что? Выполняю команды, как привык делать в Ubuntu : sudo apt update -y && sudo apt upgrade -y && sudo apt dist-upgrade -y && sudo apt-get autoremove -y; sudo apt-get autoclean -y Поэтому и слетел звук. Связался с человеком поддерживающим раздачу Voyager linux описал ситуацию. Он мне ответил, что нужно было выполнить обновление через центр приложений. Ну что же устанавливаю всё снова. Выполняю обновление через центр приложений и звук работает.
я debian использую.
sudo apt update && sudo apt full-upgrade -y && sudo apt autoremove && sudo apt autoclean && sudo apt clean
еще можно build-essential установить. Если кодить/отлаживать на c++ не собираетесь, он все равно может пригодиться для сборки какого-нибудь пакета из исходников, которого нет в репозитории.
Статья хорошая. Но, не хватает некоторых вещей. Например: 1. Вы рассказали как установить snap пакеты. Но не рассказали как отключить их поддержку насовсем. Например как это сделано в допиленном Ubunty ( это я о Linux mint - если кто не понял). 2. Вы не рассказали как настроить звук в Ubuntu. Ну не знаю, как у других у меня обычно после обновления звук отпадает . Отчего и почему не знаю.