Если в вашем компьютере установлена видеокарта от компании Nvidia, лучше использовать официальные драйвера. Качество драйвера с открытым исходным кодом Nouveau очень сильно улучшилось за последние годы, он практически не уступает проприетарному по производительности, но с ним вы не сможете использовать такие технологии, как CUDA, а производительность Vulkan будет хуже.
В этой инструкции будет рассмотрена установка драйверов Nvidia в Ubuntu 24.04 из официального сайта и с помощью репозитория. Хотя статья ориентирована в первую очередь на Ubuntu 24.04, все ниже перечисленные действия будут прекрасно работать и в других редакциях и версиях этого дистрибутива. Важно заметить, что данный способ работает для систем, у которых используется только одна видеокарта Nvidia. Для систем с интегрированной графикой есть свои особенности.
Содержание статьи
- Узнаем какой драйвер используется
- Виды драйверов Nvidia
- Какая версия драйвера подходит для видеокарты
- Установка драйверов Nvidia
- Проверка правильности установки
- Утилита настройки Nvidia
- Удаление драйверов Nvidia
- Выводы
Узнаем какой драйвер используется
Новый установщик Ubuntu позволяет во время установки системы отметить галочку Install third-party drivers for graphics and WiFi hardware. Если вы выбрали эту опцию во время установки то проприетарный драйвер Nvidia у вас уже установлен. Для того чтобы это проверить можно посмотреть какой модуль ядра используется для видеокарты с помощью команды lspci:
lspci -knn | grep VGA -A2
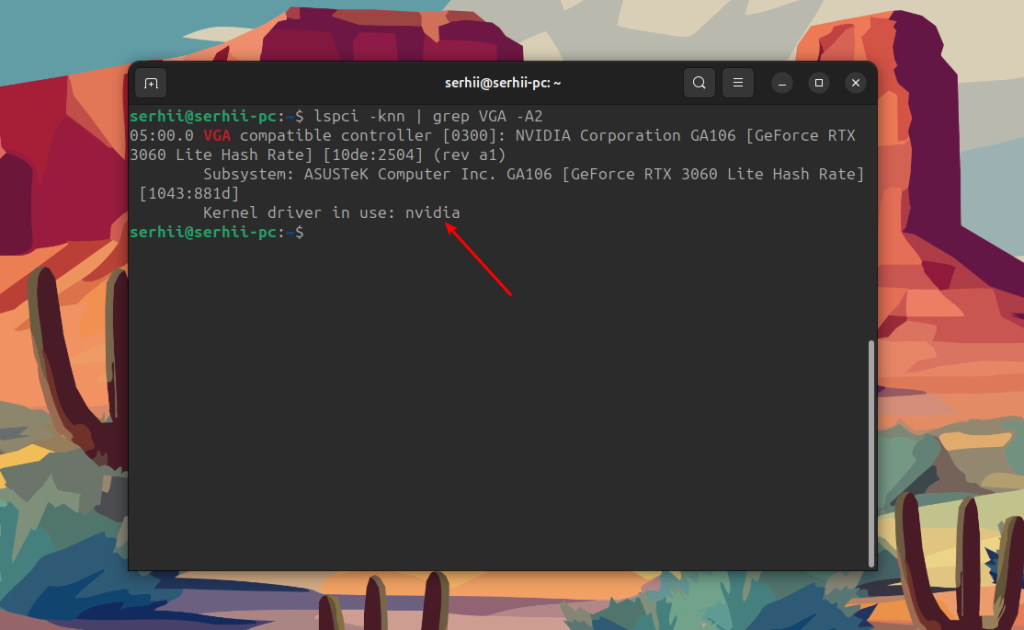
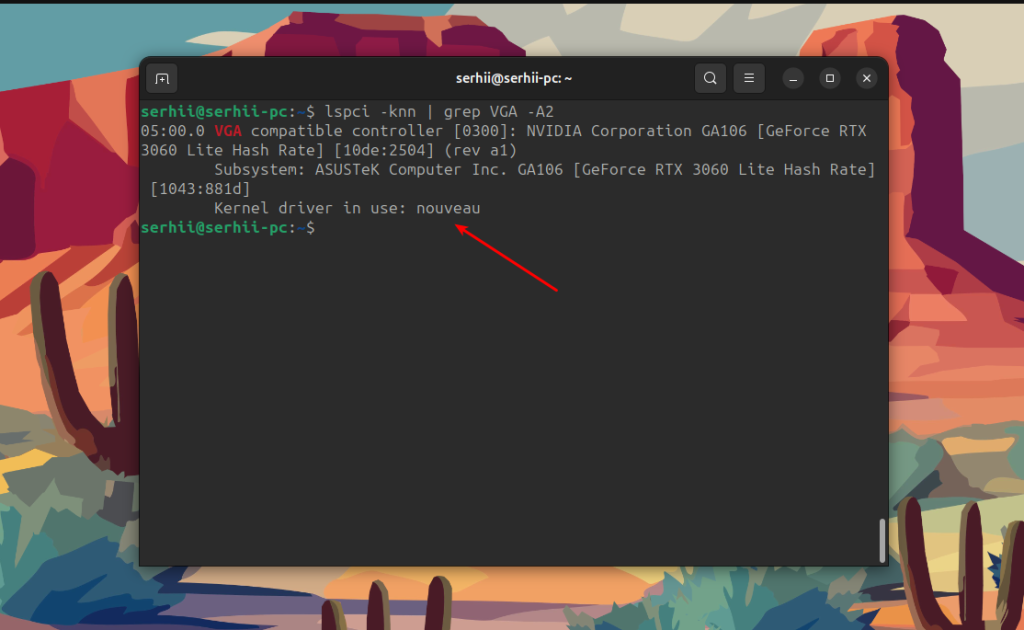
Модуль ядра выводится после Kernel driver in use, и в данном случае это уже драйвер Nvidia. А если бы использвался драйвер с открытым исходным кодом, то модуль ядра назывался бы nouveau:
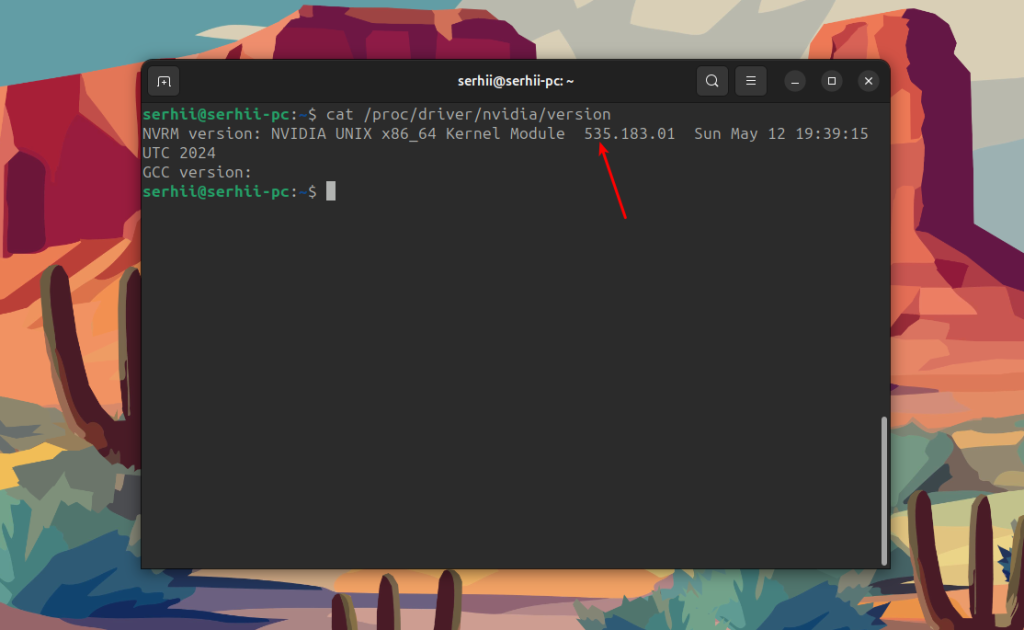
Но даже если драйвер у вас уже установлен, вы можете захотеть обновить его версию. Посмотреть текущую версию драйвера Nvidia можно выполнив такую команду:
cat /proc/driver/nvidia/version
Теперь вы знаете что используется в вашей системе, давайте теперь рассмотрим как узнать какая версия драйвера вам подходит и как её установить.
Виды драйверов Nvidia
Компания Nvidia хочет сделать исходный код своих модулей ядра для своих драйверов открытым, как это раньше сделала компания AMD. Разработка модуля с открытым исходным кодом началась в 2022 году, но компании удалось завершить переход лишь недавно в 2024 году. Однако открытый драйвер доступен только для современных видеокарт, это карты архитектур: Turing, Ampere, Ada Lovelace, или Hopper. Более старые карты не поддерживаются.
Открытие исходного кода принесет пользу сообществу в целом, повысит безопасность и удобство установки драйверов в будущем. Но на данный момент для конечных пользователей практически ничего не изменилось. Просто теперь есть две версии пакетов с драйверами: с приставкой -open и без неё. Если для вашей версии драйвера есть пакет с приставкой -open, лучше выбрать его. Если же нет, придется продолжить использовать проприетарные драйвера.
Какая версия драйвера подходит для видеокарты
Желательно устанавливать самую свежую версию драйвера, потому что драйвера постоянно улучшаются, добавляет поддержка новых функций, улучшается производильность и исправяются ошибки. Но прозводитель, как правило, удаляет поддержку устаревших видеокарт из драйвера. Например, на момент написания статьи самая актуальная версия драйвера 555. Однако если у вас видеокарта GTX 780, то для неё следует использовать драйвер версии 470, который был выпущен ещё в 2021 году.
Вы можете подобрать версию драйвера к видеокарте используя официальный сайт Nvidia. Но для этого надо знать модель видеокарты. Для этого можно спользовать команду lspci:
sudo lspci -vnn | grep -i VGA -A 12
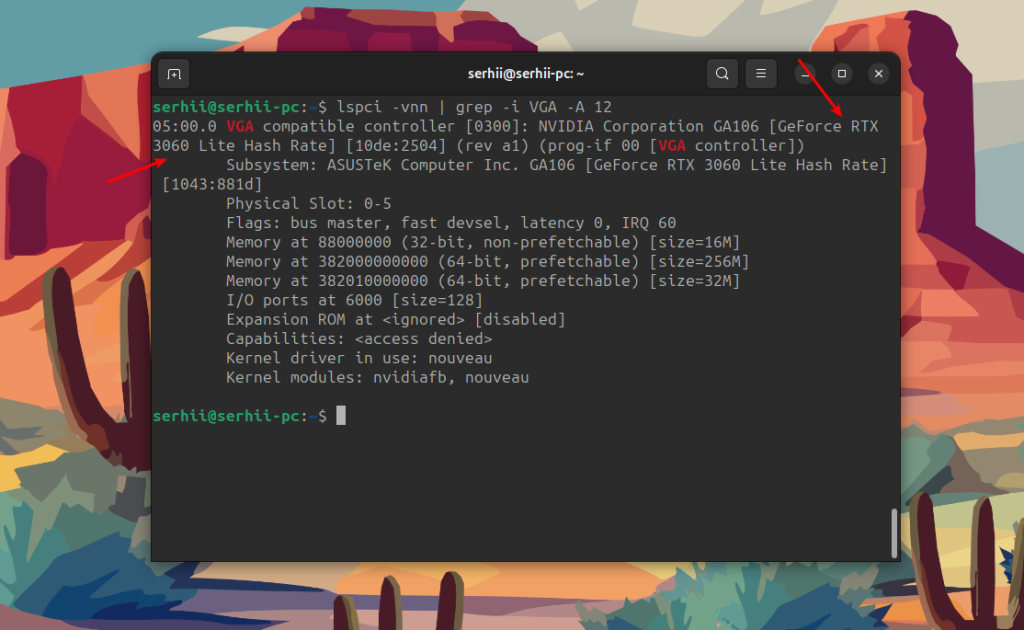
В этом примере используется видеокарта Nvidia RTX 3060. Дальше откройте страницу загрузки драйверов Nvidia и заполните данные вашей видеокарты:

Тут нужно выбрать тип продукта, серию, модель, операционную систему и язык. Тип продукта и серию можно понять из информации полученной от lspci. В Product Type в большинстве случаев для видеокарт для домашних ПК нужно выбрать GeForce. Дале Product Series - Geforcee RTX 30 и потом в следующем поле выбрать точную модель своей видеокарты.
Обратите также внимание на параметр Download Type. С помощью него можно указать какая версия драйвера вам нужна - стабильная или самая новая. Для получения стабильной версии выберите Production Branch. Далее нажмите кнопку Search. На открывшейся странице вы увидите рекомендуемую версию драйвера:
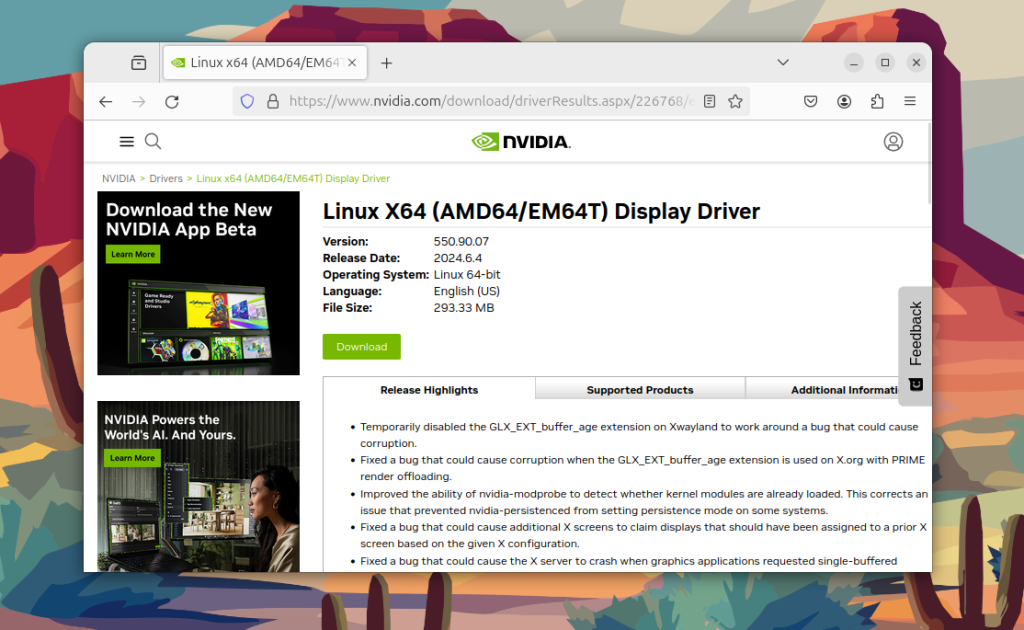
Для RTX 3060 - это 550 если вы выбрали стабильную версию и 555 если самую свежую. А для более старых вдиеокарт, версия драйвера может быть, более давней. Напрмер, GTX 780:
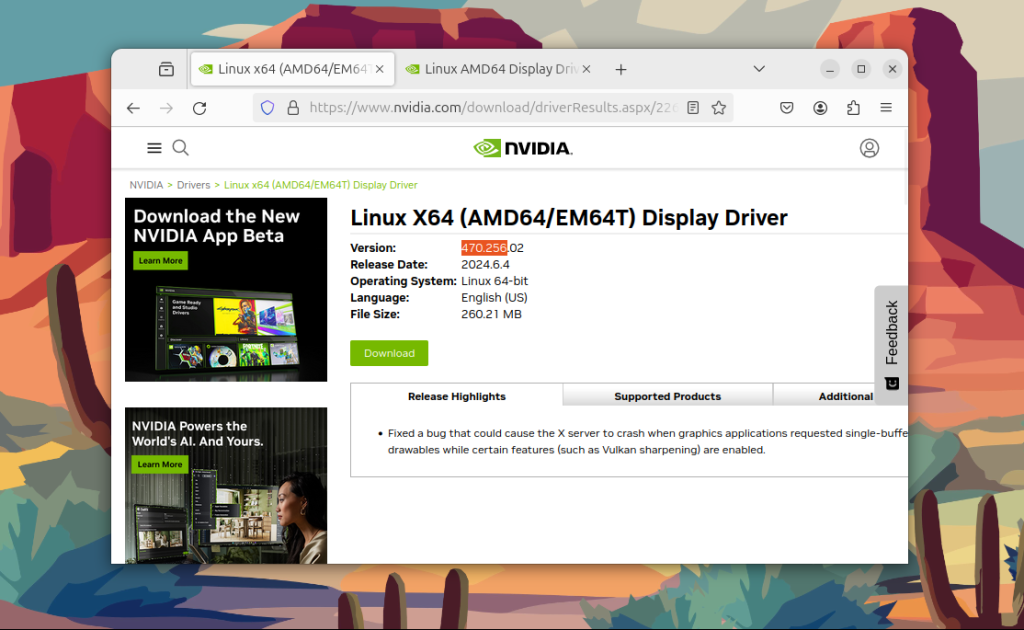
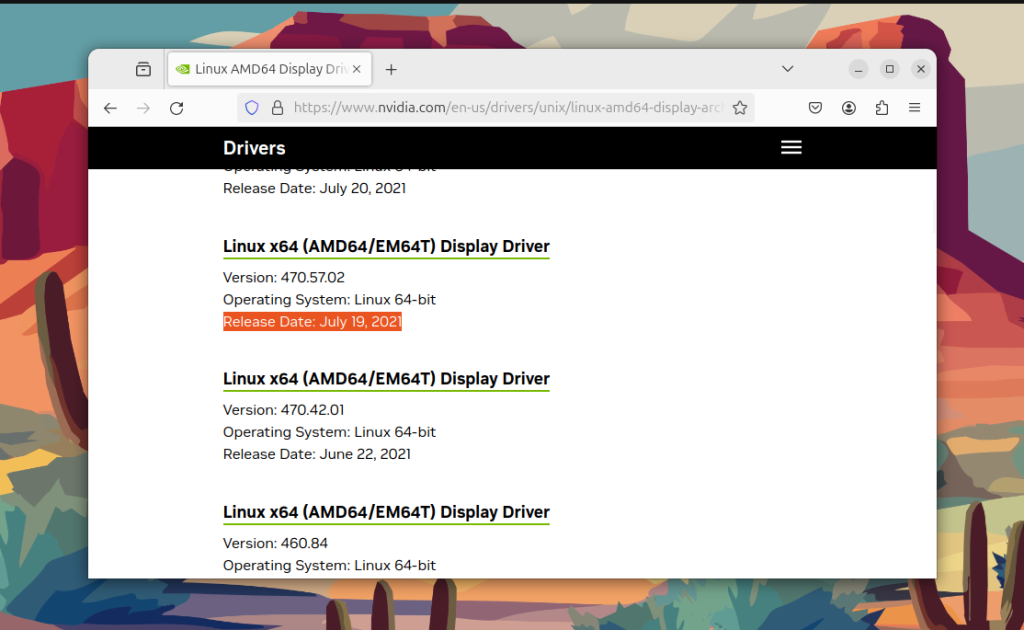
Обратите внимание, что у версии драйвера есть мажорный и минорный номер. Старые версии драйвера могут полчать обновления с исправлениями ошибок или проблем с безопасностью, в таком случае мажорная версия остается той же, а минорная версия увеличивается. В данном примере написано что драйвер 470.206 выпущен в июне 2024, однако впервые версия 470 была выпущена в 2021 году. Вы можете воспользоваться архивом драйверов Nvidia для того чтобы сориентироваться в каком году была выпущена определённая версия драйвера.
Теперь мы знаем какой драйвер, нужен, уже на этом этапе можно скачать установочный пакет и переходить к установке, но мы поступим по-другому. Дальше будет рассмотрена установка драйвера Nvidia в Ubuntu 24.04 из репозитория PPA.
Установка драйверов Nvidia
1. Установка драйвера из официальных репозиториев (новые, стабильные)
В Ubuntu есть графическая утилита Драйверы и устройства, а также консольная утилита ubuntu-drivers для управления драйверами. Однако там всё интуитивно понятно. В этой статье я хочу показать как всё сделать вручную с помощью apt. Для того чтобы получить список версий драйверов nvidia, доступных в репозиториях используйте следующую команду:
sudo apt search nvidia-driver
В выводе команды вам нужны пакеты с именем формата nvidia-driver-<version>:
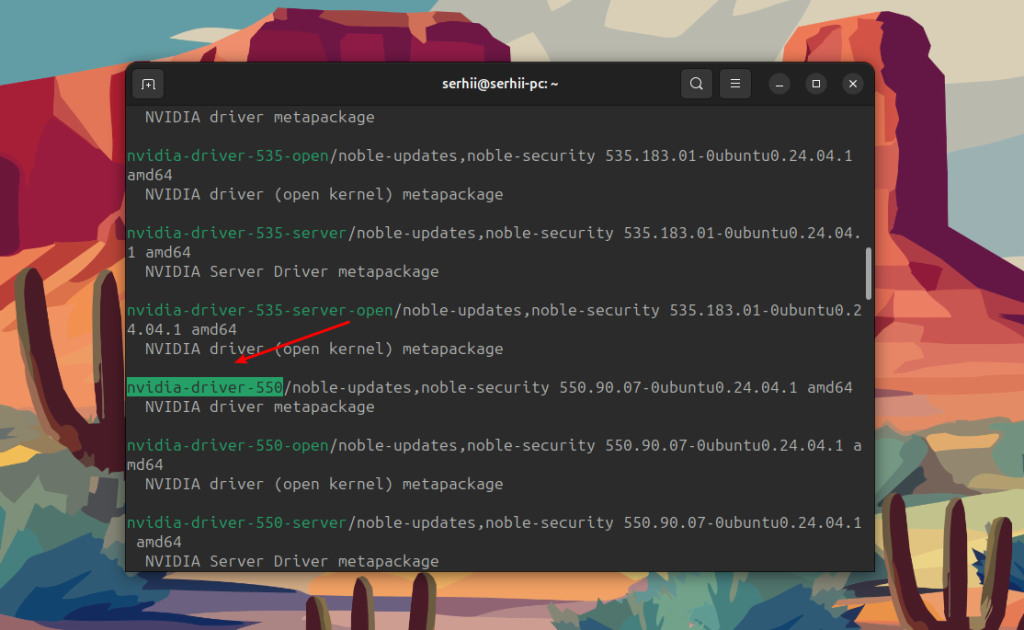
В Ubuntu 24.04 доступна версия драйвера 550, стабильная и рекомендуемая официальным сайтом. Далее вы можете её установить с помощью команды:
sudo apt install nvidia-driver-550
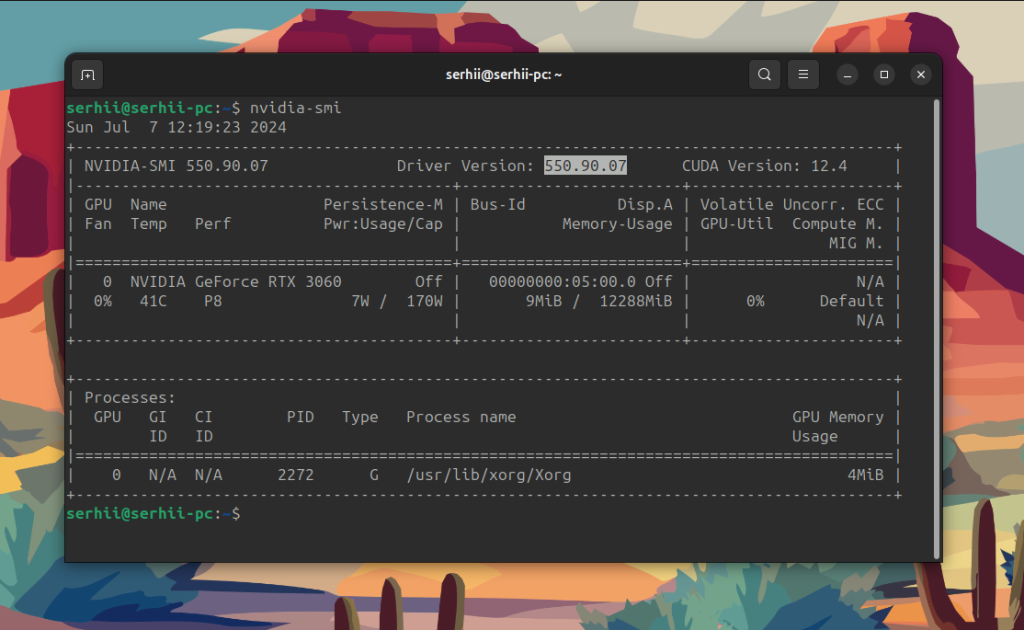
И это всё. Теперь достаточно перезагрузить компьютер и вы получите новую версию драйвера. Вы можете посмотреть версию драйвера не только с помощью команды cat, но и в nvidia-smi:
nvidia-smi
Но если вы хотите самую новую версию, которой ещё нет в репозиториях, то надо использовать PPA.
2. Установка из PPA репозитория (самые новые)
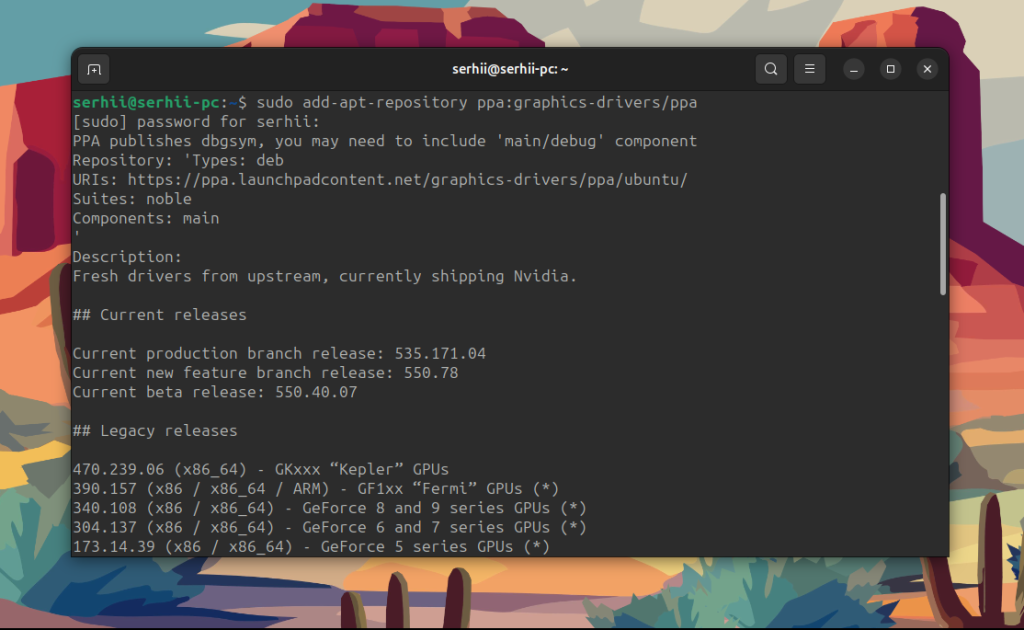
Репозиторий PPA graphics-drivers содержит самые последние версии драйверов nvidia. Его мы и будем использовать для установки. Для добавления graphics-drivers в систему, выполните команду:
sudo add-apt-repository ppa:graphics-drivers/ppa
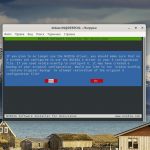
Добавление репозитория надо подтвердить нажатием клавиши Enter:
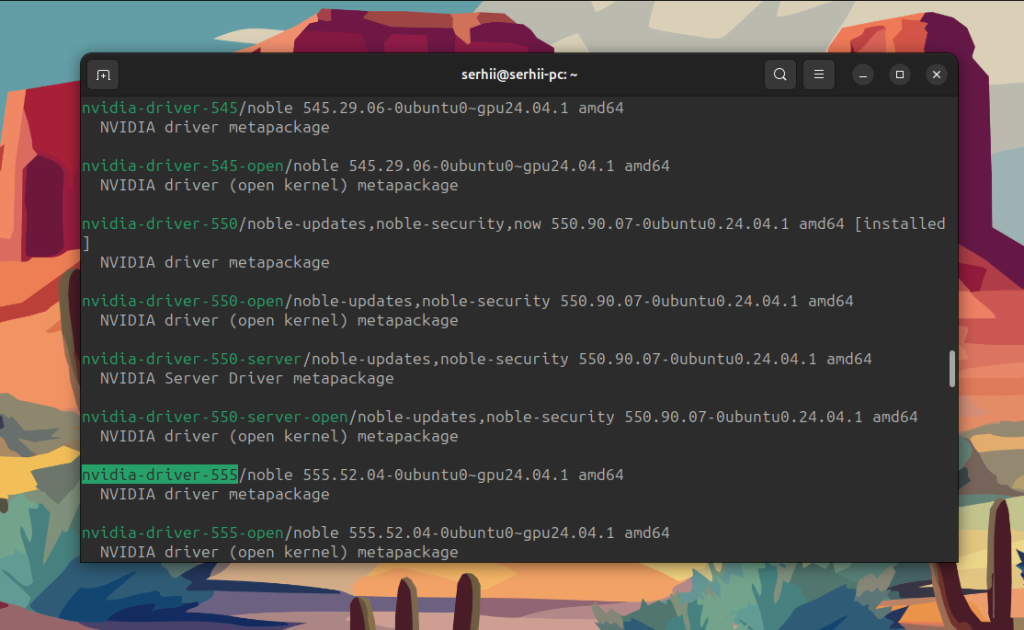
Теперь PPA репозиторий добавлен и списки пакетов обновлены, можно переходить к установке. Если вы снова выполните поиск по репозиторию то apt найдет самую свежую версию 555, которой раньше не было:
sudo apt search nvidia-driver
Для установки версии 555 используйте команду apt:
sudo apt install nvidia-driver-555
После завершения установки перезагрузите компьютер.
3. Установка драйверов Nvidia с помощью GUI (стабильные, рекомендовано)
Если не хотите пользоваться консолью, можете включить драйвер с помощью утилиты Software & Updates. Однако обратите внимание, что утилита будет работать только если вы ещё не пытались устанавливать драйвера через консоль или из официального сайта. В противном случае, все опции будут неактивны или начнут возникать ошибки во время установки. Ещё одна особенность этой утилиты, в том что она позволяет установить только проверенные версии. Например, версия 550 здесь не доступна, хотя она есть в репозитории. Для запуска утилиты откройте главное меню и наберите в поиске Driver:
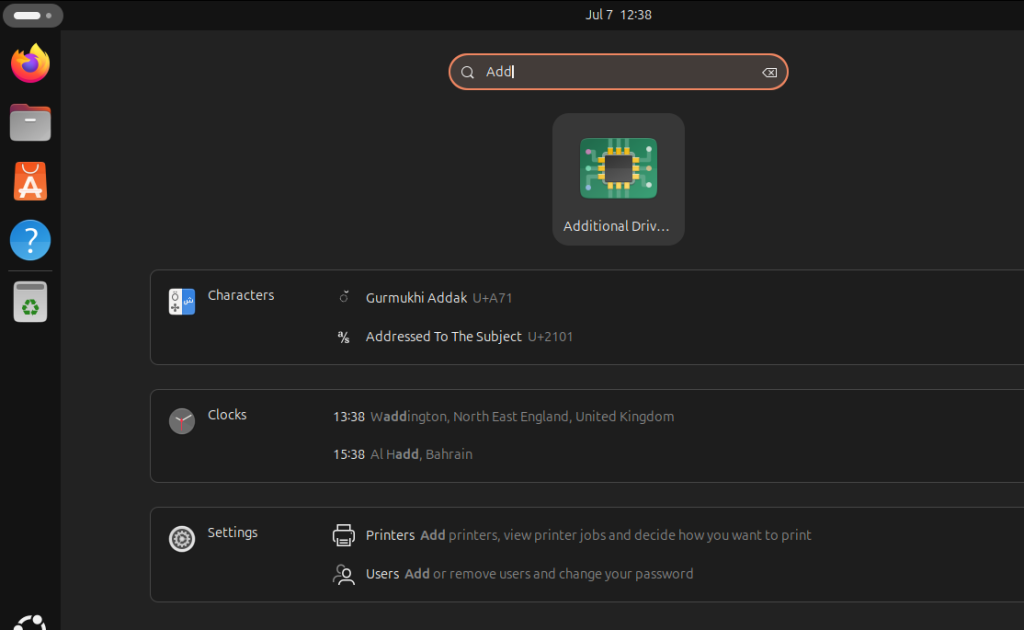
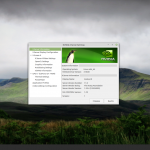
Запустите ярлык Additional Drivers. Это часть приложения Software & Updates. Перед вами сразу откроется вкладка Additional Drivers:
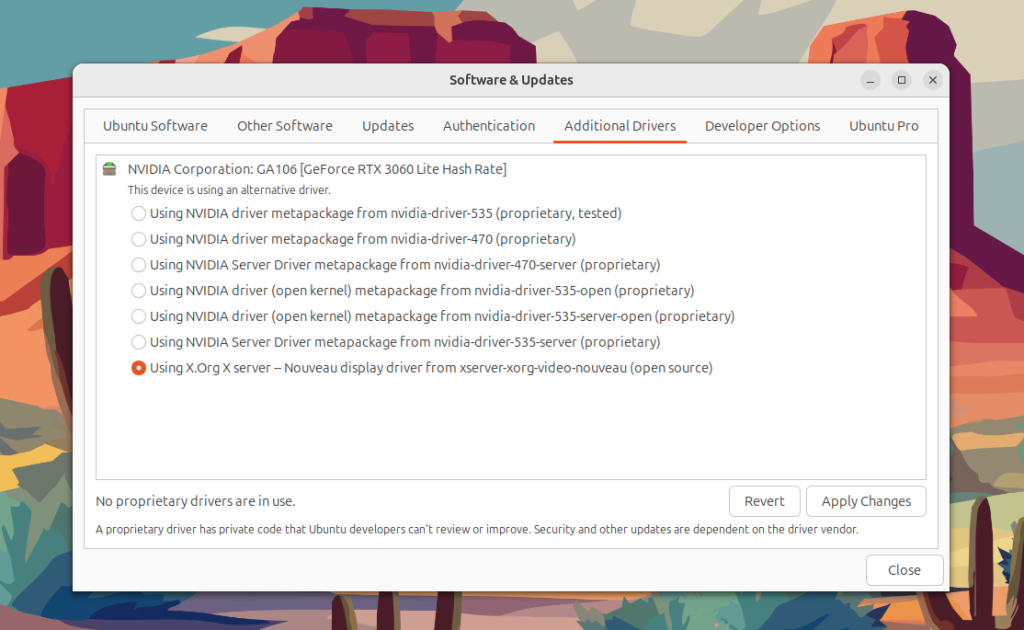
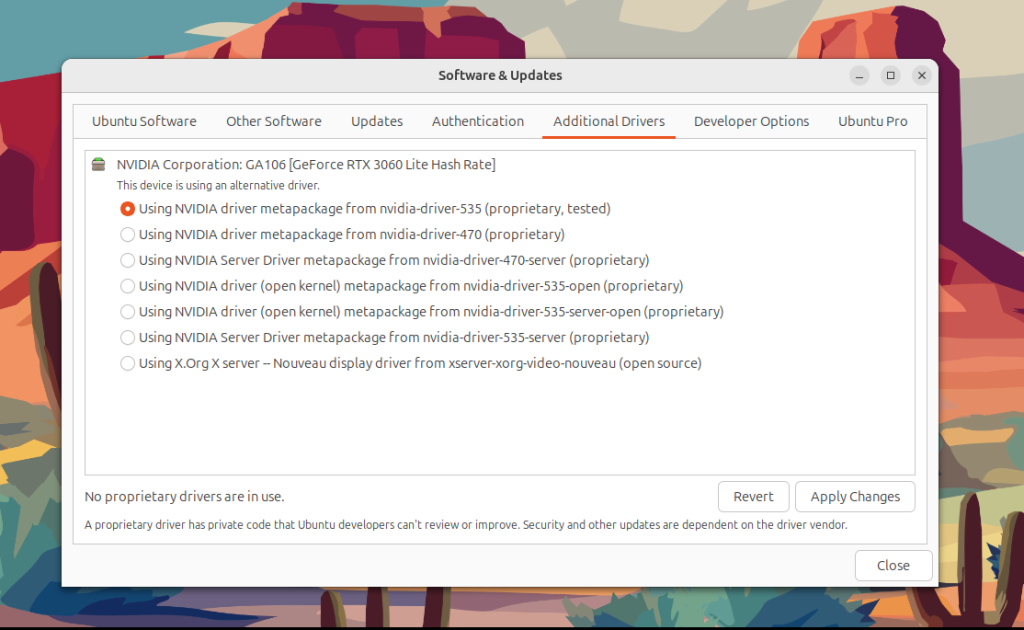
Выберите нужную версию драйвера и нажмите кнопку Apply Changes.
Утилита спросит пароль пользователя, а потом пойдет процесс установки. После завершения утилита сообщит что надо перезагрузить компьютер. Для этого нажмите кнопку Restart:
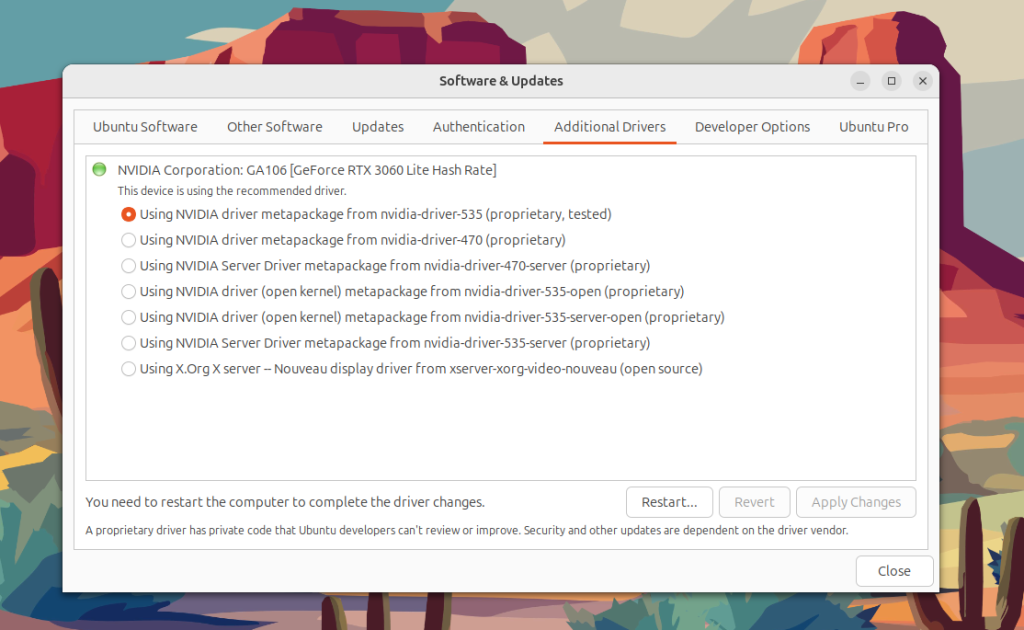
После перезагрузки будет активен уже выбранный драйвер.
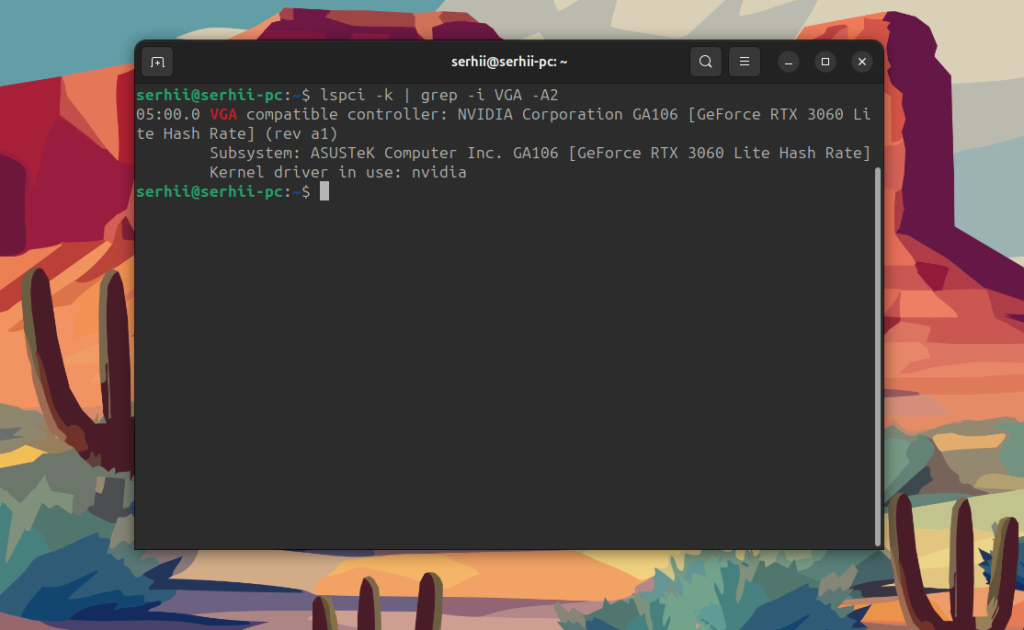
Проверка правильности установки
Самый простой способ убедится что драйвер Nvidia установлен и работает, это использовать утилиту lspci, как было показано в начале статьи:
sudo lspci -k | grep -i VGA -A2
Ещё можно проверить поддержку аппаратного ускорения утилитой glxinfo:
glxinfo | grep OpenGL | grep renderer
Значение параметра OpenGL renderer должно соответствовать модели вашей видеокарты. Если там находиться слово MESA - это значит, что для аппаратного ускорения используются все еще стандартные драйвера.
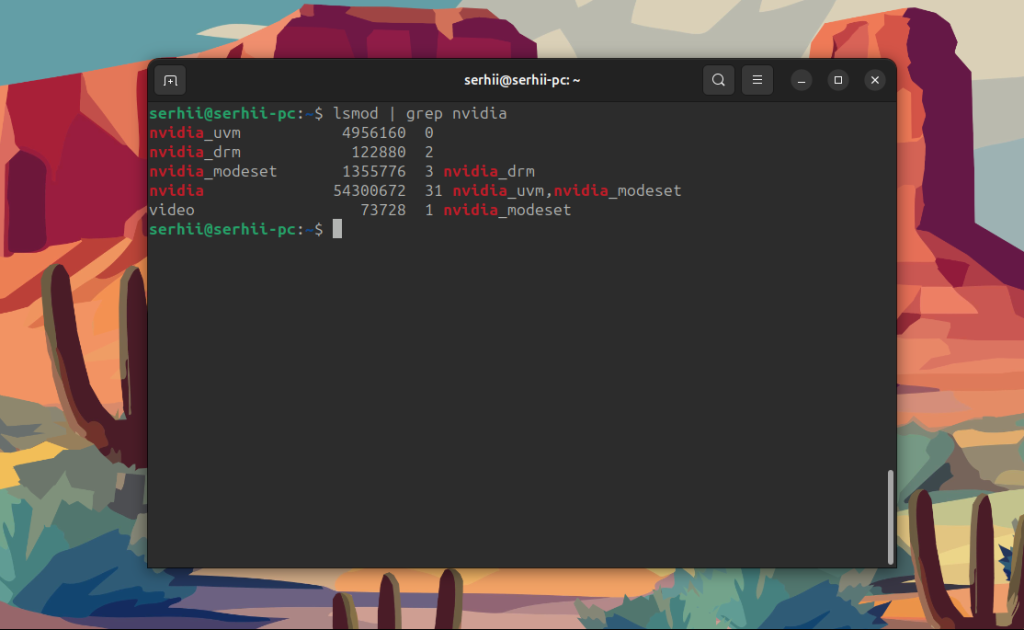
Убедится что модуль ядра nvidia загружен можно с помощью утилиты lsmod:
lsmod | grep nvidia
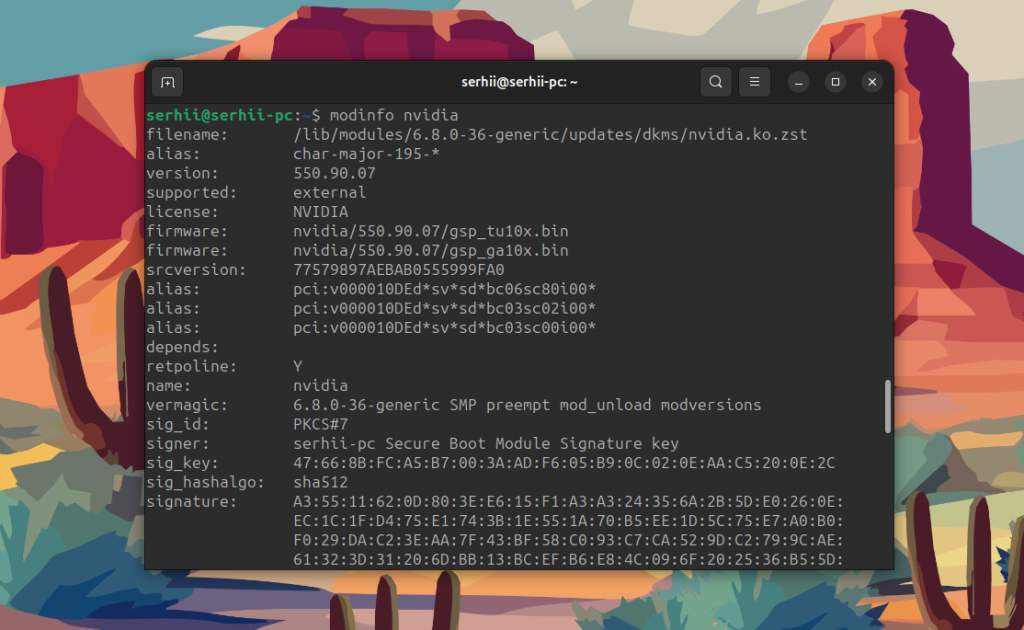
А посмотреть информацию об этом модуле с помощью modinfo:
modinfo nvidia
Утилита настройки Nvidia
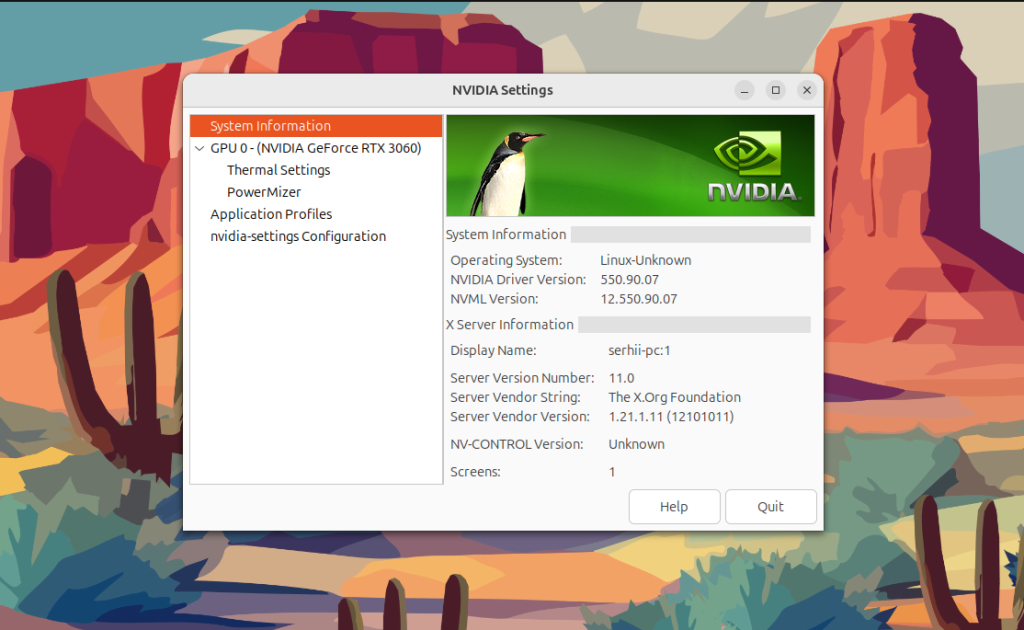
Вместе с драйверами в системе устанавливается графическая утилита настройки Nvidia X Server Settings, которую можно запустить из меню, или из консоли выполнив:
nvidia-settings
Эта утилита позволяет посмотреть информацию о видеокарте, подключенном мониторе, а также настроить различные параметры.
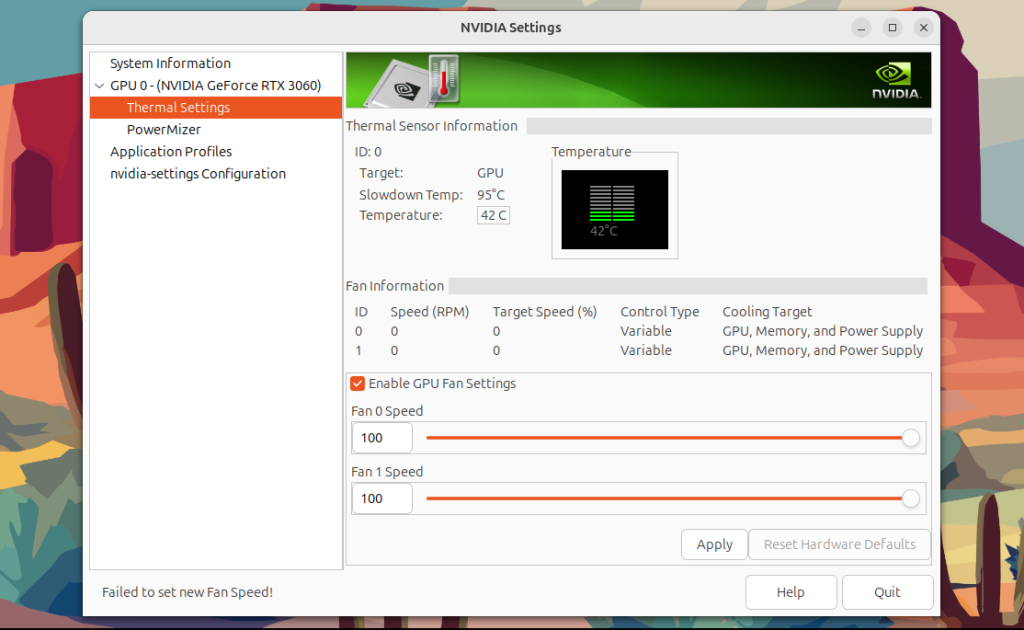
Например, на вкладке Thermal Settings можно настроить скорость вращения вентиляторов на видеокарте и посмотреть её температуру в реальном времени:
Удаление драйверов Nvidia
Если во время установки что-то пошло не так попробуйте удалить драйвер Nvidia Ubuntu в режиме восстановления. Для открытия этого режима в меню загрузчика Grub выберите Дополнительные параметры Ubuntu, а затем пункт recovery mode или режим восстановления. Обычно меню Grub будет скрыто. Но если при последней загрузке была ошибка, то оно появится и вы сможете выбрать режим выосстановления.
В режиме восстановления перемонтируйте файловую систему для записи:
mount -o remount,rw /
Далле удалите все пакеты nvidia:
sudo apt purge nvidia-*
Это всё. Дальше можно перезагрузить компьютер и ядро автоматически загрузит свободный драйвер nouveau.
Выводы
Вот и все, установка драйвера Nvidia в Ubuntu 24.04 завершена. Теперь вы можете играть игры, работать с искусственным интеллектом или выполнять другие задачи, для которых нужна видеокарта. Но будьте осторожны, теперь нельзя обновлять ядро выше поддерживаемой драйвером версии, потому что иначе система не загрузится.
Ещё, я специально умолчал в статье про способ установки драйвера из официального сайта. Ставить программы в обход пакетного менеджера плохая практика. Так можно очень просто не намерено повредить свою систему и воостановить всё как было будет гораздо сложнее.

А что делать если видеокарта не определяется вовсе? Хотя точно, что карта Nvidia установлена наряду с картой HD Intel. Она работала и была видна в Ubuntu 15.04 на этом же буке.
Отличная статья, жаль не прочёл её, когда обновлял свой драйвер. Единственное замечание: перед обновлением драйверов необходимо обязательно выключить Secure Boot, если у вас Dual Boot система, т.е. кроме Linux установлена ещё и Windows. Иначе будут проблемы с загрузкой Linux. После перезагрузки ПК Secure Boot можно снова включить, всё будет нормально работать.
Спасибо за уточнение про Secure Boot! Но вот по другим статьям пишут что повторное включение Secure Boot после перезагрузки не дает "нормальной" работы.. В любом случае буду сегодня устанавливать драйвер и попробую включить её обратно. Еще раз спасибо за коммент.
Спасибо:)
Отличная статья!
Здравствуйте! Подскажите, если модуля ядра 3:
Kernel modules: nvidiafb, nouveau, nvidia
Может ли из-за этого быть конфликт между ними? Просто у меня явно неправильно установлен\настроен драйвер, т.к не определяет мониторы (одного вообще не видет). И сильно крутит куллер на карте
добавьте статью по установке драйверов в linux mint на чипе via, долго искал решение, и мне помогла одна строчка sudo apt-get install xserver-xorg-video-openchrome.
дополнительная информация, как было и как стало находится тут https://linuxmint.com.ru/viewtopic.php?p=54324#p54324
Доброго времени суток, подскажите, установил проприетарный драйвер от Nvidia, 390 серии, всё работает, я так понял он поддерживает технологию Vulkan, надо ли для её работы что-то дополнительно скачивать и устанавливать, или она по умолчанию используется?
Как настроить 1440х900 на второй Монике?
630-ю видеокарту не поняла 18.04 убунта
На Ubuntu 18.04 с картой GeForce GT 710 были проблемы с драйвером 450. Обновить драйвер получилось по данной инструкции через GUI до 455. Проблемы пропали. Теперь идеально работает в UHD.
ставил дрова на 1050
всё пошло по п#зде, пришлось удалять
вообще чот неудачно всё ставится на убунту 20, даже кодеки не поставились "vlc"
пришлось через терминал и apt устанавливать в итоге у меня теперь 2 программы vlc
начиная с версии ядра 5.5 Nvidia прекратила поддержку драйверов 340 серии, есть альтернативный драйвер:
sudo add-apt-repository ppa:kelebek333/nvidia-legacy
sudo apt-get update
sudo apt install nvidia-340
Драйвер не хотел правильно устанавливаться. Тем более у меня Xubuntu 18.04.3 ,а там нет гнома и софтварно не установишь драйвер.
Поэтому устанавливал из PPA репазитория.
Но перед этим необходимо отключить драйвер nouveau.Отключал по методу "Отключить драйвер Nouveau в Ubuntu 18.04 Linux".Далее установка из PPA, и перед последним шагом установки отключил display-manager.
Если устанавливать по другому , у меня вылазило разрешение 640 на 480 или вообще рабочий стол не грузился.
Спасибо за совет, только так и смог установить 340 driver от Nvidia.
Установил Linux Mint 20.3, nVidia GT730 c nvidia-driver-470 (последняя версия, рекомендованный). Имею проблему с выходом из "ждущего режима": система загружается, экран не выводит сигнал, просто чёрый дисплей в режиме ожидания. Судя по запросам и форумам в интернете -проблема распрастранённая и с другими картами, решения не нашёл. Ткните носом меня- куда копать, уже неделю бьюсь.
Может на форуме Минт следует поискать
Решил я почистить видеокарту, а после включения компьютера появилась проблема с минимальным разрешением экрана. Даже на переустановке системы окошки огромные и кнопки не видно.
Решилась проблема когда я вспомнил о питании видеокарты. Подключил 6 pin обратно и все заработало.
Спасибо за статью, то что надо!
после установки драйверов с сайта, видимо неудачной, какая-то ерунда началась с системой.
Пропали проприетарные драйверы из диспетчера драйверов. (писал, нет драйверов)
А после обновления ядра применился драйвер nouveau.
Помогла команда
sudo ubuntu-drivers autoinstall
в выхлопе какие-то проблемы пытались устраниться, что-то неудачно. но в итоге в диспетчере стали отображаться версии драйверов.
В итоге всё нормально заработало.
Спасибо!
СПАСИБО!!!! НА КАЛИ ЛИНУКС ПОМОГЛО. УСТАНАВЛИВАЛ С СКАЧАНОГО ДРАЙВЕРА С САЙТА ИНВИДИО
"Устанавливать драйвер можно только из консоли. Если в момент установки будет запущен графический сервер, то ничего хорошего из этого не получится, вы просто не сможете потом загрузится в систему." Об этом неплохо бы в начале сообщать.
Просто гори в аду со своими советами!! Убунту не загружается теперь никак даже с флешки!
Коллеги, а как быть если установлены две видеокарты?
Ставлю драйвера nvidia, а обои рабочего стола только на мониторах, подключенных к первой карте. Мышку видно на мониторах второй карты, а перетащить туда окно - нет.
ШИ сказал- на Кубунту 24.04 будет стоять 390й...но лінуксоид-бос сказал: Голову ему оторвать! И верно-поддержки нет, счетчик сразу ожил и в итоге стер ОС. Пора, пора рисовать лаве...
Увы но open драйвера, как раз не рекомендуют ставить , ибо не совсем стабильны, лучше выбирать проприетарные. Много жалоб было на стабильность при open драйверах на свежих карточках.